Last Updated on December 28, 2022 by Steve
What is OpenLiteSpeed?
Blazing-fast WordPress with LSCache. OpenLiteSpeed is the Open Source edition of LiteSpeed Web Server Enterprise and contains all of the essential features, including HTTP/3 support. OLS provides enormous scalability, and an accelerated hosting platform for WordPress. The stack we use at Best WP gives you OpenLiteSpeed, PHP, MySQL Server, WordPress, LiteSpeed Cache, and other useful applications.
OpenLiteSpeed Main Features
- Event-driven architecture with extremely low resource (CPU and RAM) overhead
- Handles hundreds of thousands of concurrent connections without load spikes
- High-performance coding using kqueue (FreeBSD and OS X), epoll (Linux), /dev/poll (Solaris), and poll
- Worker processes for scalability. Ability to bind certain processes to particular workers
- WebAdmin GUI with build-in real-time statistics graphical dashboard
- Rewrite engine uses Apache mod_rewrite syntax
- Support of third-party modules through API (LSIAPI)
- High Performance Page Caching
Name Based hosting
Name-based virtual hosting assigns virtual hosts based on domain names, not IP addresses. With name-based virtual hosting, you can host more than one website (virtual host) on each IP address.
Use the following guidelines to set up name-based virtual hosting:
Setup DNS Properly
Forward the domain names of your web sites to the IP address used by your web server. This is commonly done by adding an “A” name entry to the DNS zone file for the website. This is not part of your OpenLiteSpeed configurations.
Setup the Virtual Hosts in the Webadmin Console
Create a Virtual Host for Each Website
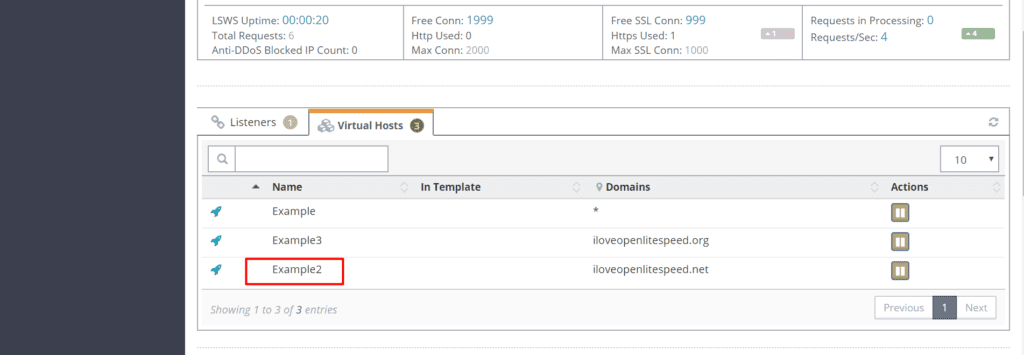
First, make the virtual host’s directories. I will name my virtual host “Example2” (because I’ve used Example and Example3 for other guides). In the command line, I go to my LSWS directory and make the following directories:
cd /usr/local/lsws
mkdir Example2mkdir Example2/{conf,html,logs}I then make conf owned by lsadm:lsadm (the WebAdmin console user) so that only the WebAdmin console will be able to manipulate configurations. (You should not allow other users permission to manipulate your configuration.):
chown lsadm:lsadm Example2/confThen I go to the WebAdmin console > Virtual Hosts > Add to add the virtual hosts to OpenLiteSpeed:

You have to enter the virtual host’s name, the virtual host root file, and the virtual host configuration file. You also need to choose whether to enable scripts on this site and whether users can access content outside of this virtual host root from the site (Restrained).
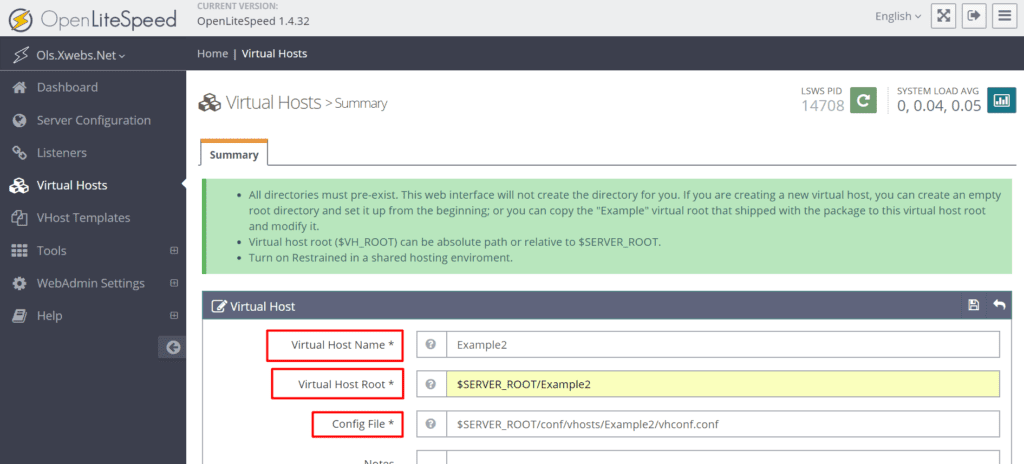
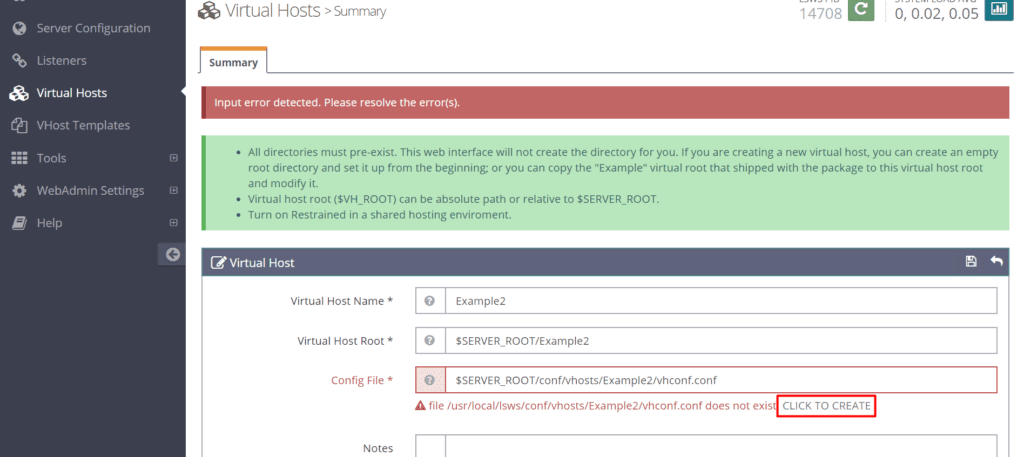
I don’t have a virtual host configuration file yet, because I’m starting from scratch, so I tell OpenLiteSpeed to make one for me:
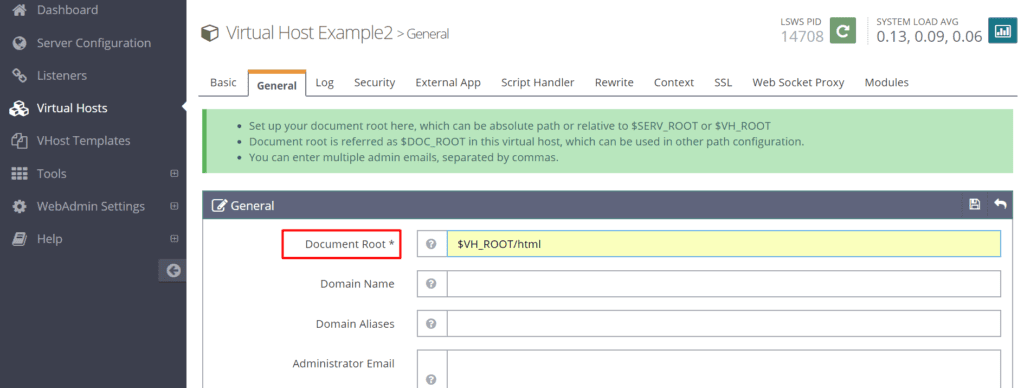
Then I save, go back into the virtual host’s configurations, and specify my document root:
Create and Assign Listeners
Go to the WebAdmin console > Listeners.
You can have one listener to listen on all local IP addresses, or you can create multiple listeners with each listener only listening to a specific IP address. Many users will find it simpler to have one listener that is then mapped to different domains, but having multiple listeners can be useful if, for example, you wish to set aside certain server processors for certain sites or conduct special functions on separate ports.
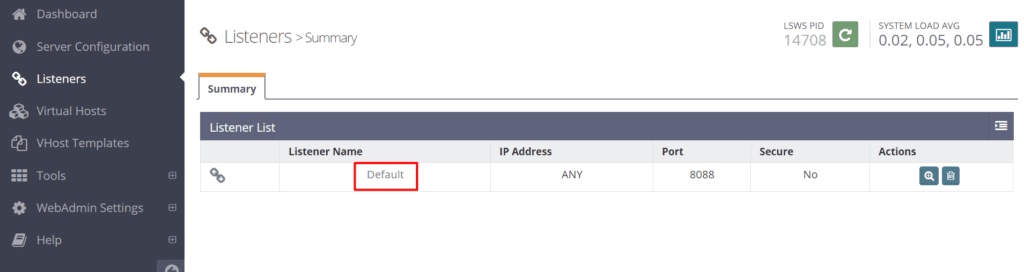
I don’t need anything special, so I just go to the Default listener (that listens to all IPs on port 80):
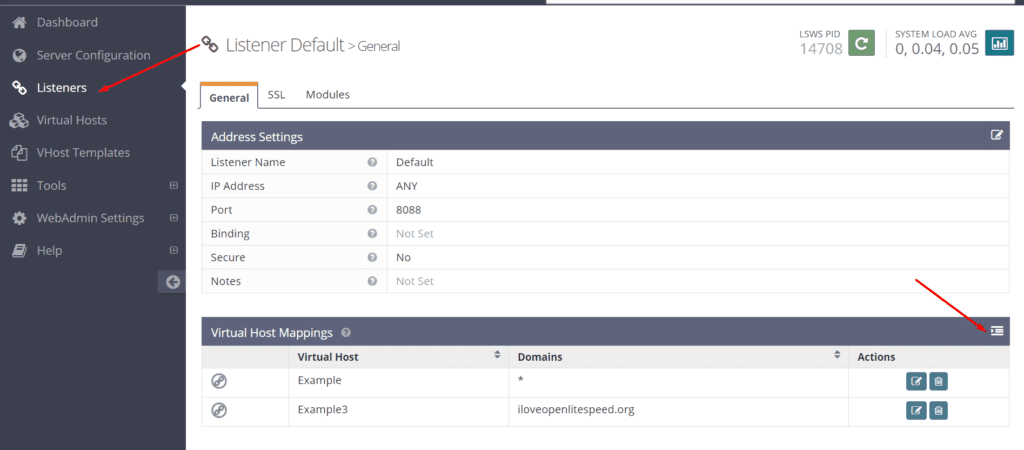
And add a new mapping:
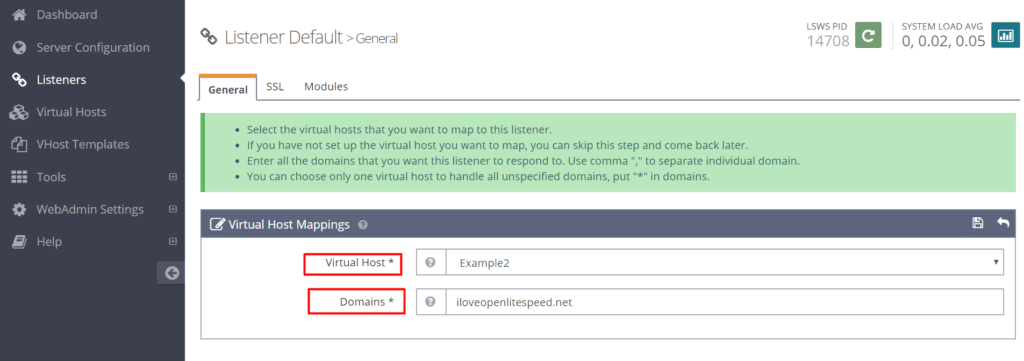
And input the domain for my virtual host: (In the Domains setting, “your.domain” will match to both “www.your.domain” and “your.domain”. The leading “www.” in a domain name is ignored.)
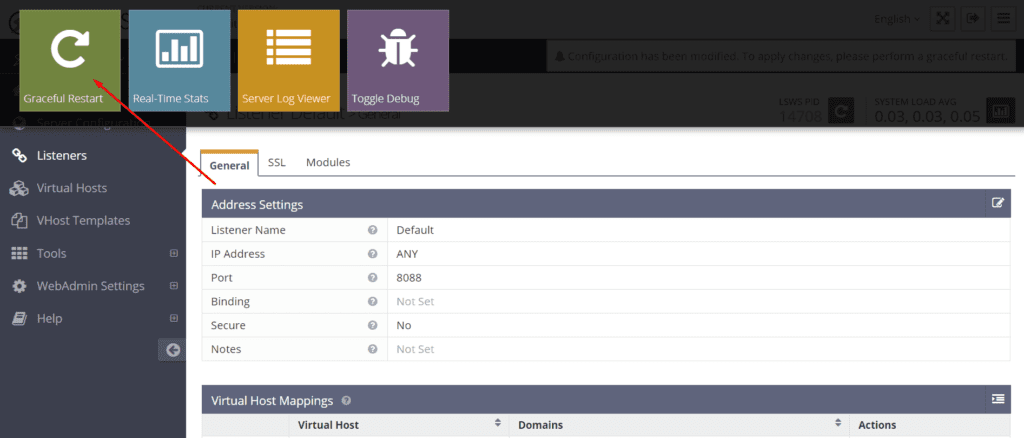
Graceful Restart
And we’re done!
Conclusion
Hope you found this article helpful.