Last Updated on July 30, 2021 by Steve
Install Yoast SEO
WordPress is pretty good out of the box when it comes to most things, including SEO. To get the most out of WordPress SEO I would recommend installing a plugin designed for this task. This plugin will give you total control over optimizing what Google sees from your WordPress site.
There are many options for SEO plugins available for WordPress such as SEOPress, Rankmath, All in One SEO etc. Yoast SEO, the free version, is the most popular in the WordPress repository by far at the time of this posting so I would recommend it for most bloggers getting started. In this post I will guide you in installing and configuring it. This guide is meant for beginners. Look out for my next post that will go into detail on configuring advanced Yoast SEO features.

Yoast SEO will help you to:

- Write better content with keyword and page analysis
- Edit meta descriptions
- Enable breadcrumbs
- Generate XML sitemaps automatically
- Add social and schema markup
Yoast SEO offers a long list of features and optimization options. The plugin currently has a five-star rating and over five million installations according to WordPress.org. You can download it from the WordPress repository and upload it to your site or install it from your WordPress dashboard by following the steps below.
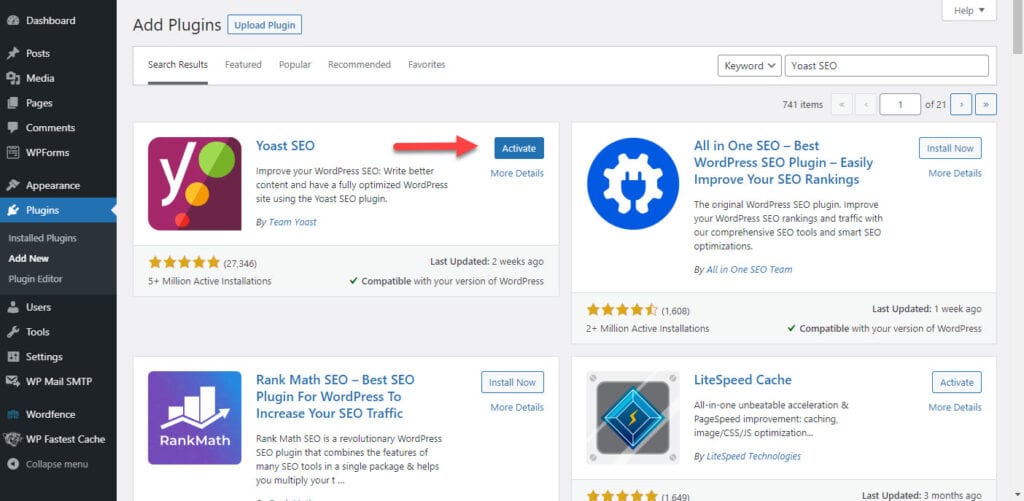
Step 1: Search for Yoast SEO
Under the Plugins section of your WordPress dashboard, select Add New. Then, search for Yoast SEO:

The Yoast SEO card will come up in the search results along with a Install Now button.
Step 2: Install the Plugin and Activate
Click the Install Now button which will turn into a blue Activate button:
By activating the plugin Yoast SEOs functionalities will be enabled.
Step 3: Access Yoast SEO Settings
You will see a new section in your sidebar once the plugin has been activated:
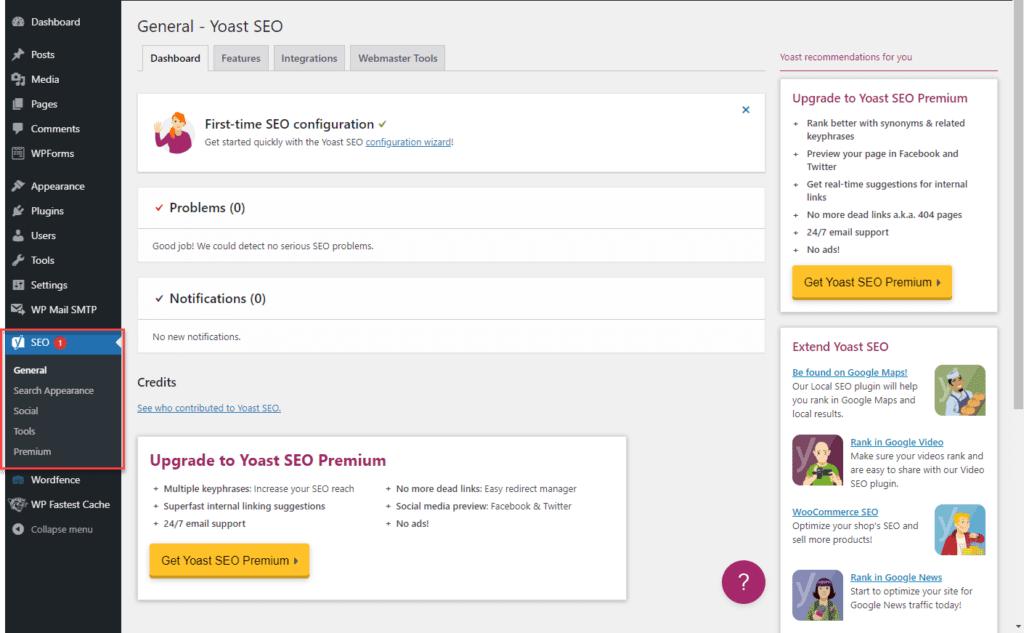
In the General settings page you can access options to optimize your site.
How to Use the Yoast SEO Configuration Wizard
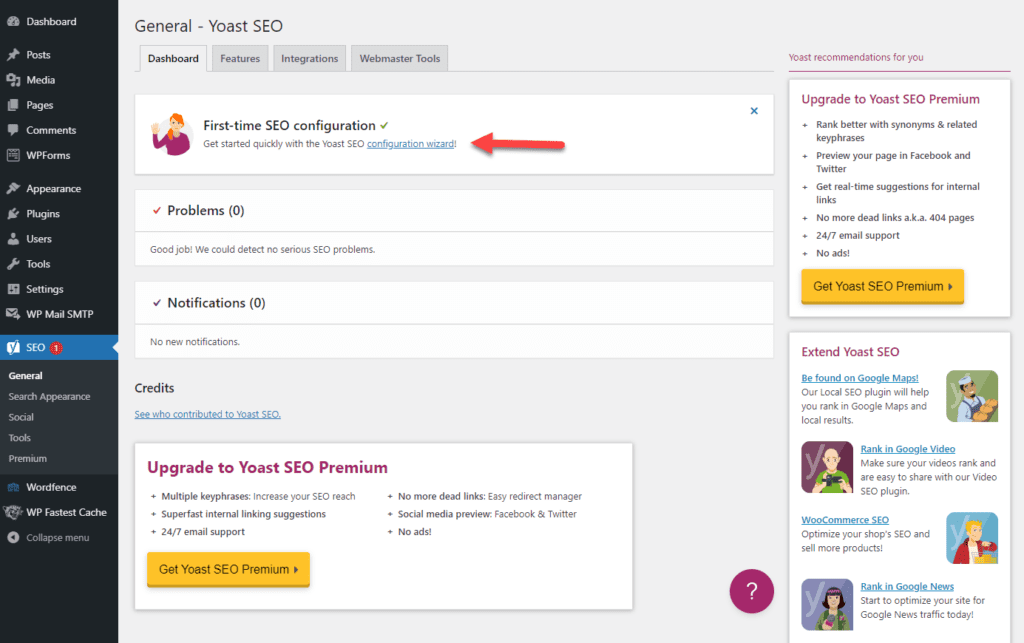
Now that you have installed the Yoast SEO plugin you can access the Yoast SEO dashboard by clicking on the SEO tab that is now on your WordPress dashboard. You will see a big notice for First-time SEO configuration, if this is your first time using the plugin.
Yoast SEO gives you a guided tour to help you set up all basic settings by clicking the configuration wizard link.
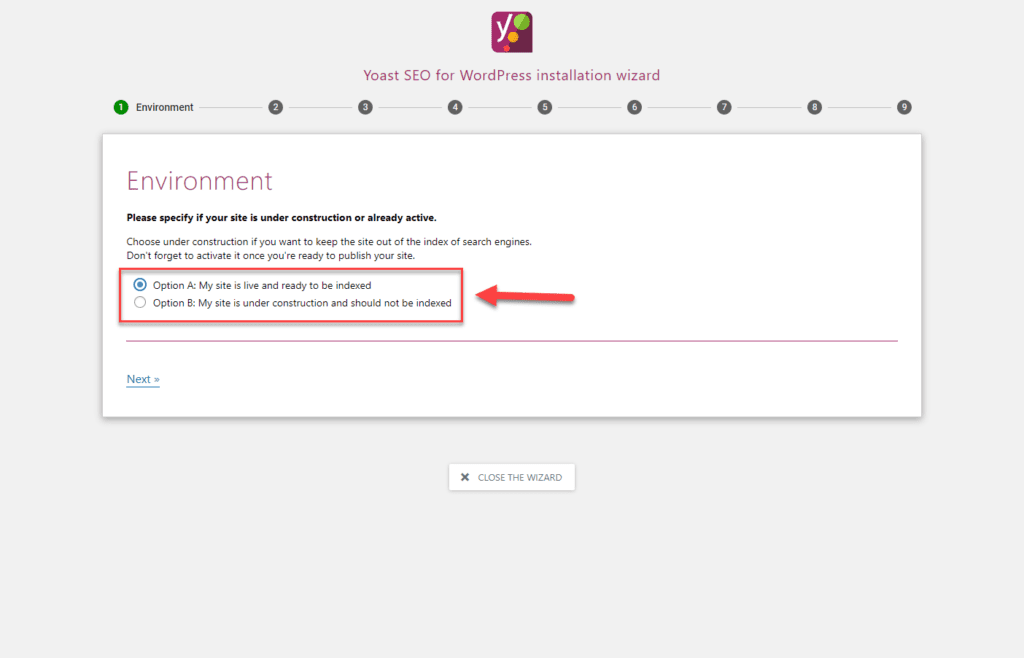
Section 1: Environment
After clicking that link on the first page of the wizard click Configure Yoast SEO. In the Environment area choose Option A unless you are working on a development Website:
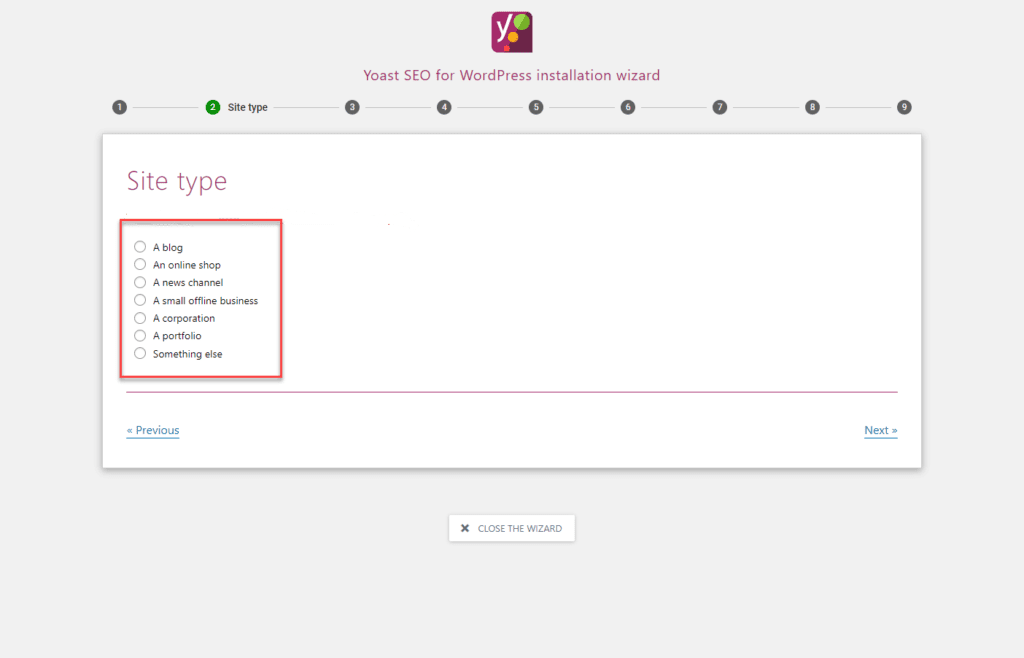
Section 2: Site Type
Choose the type of site that best matches yours in this section:
Section 3: Organization or person
Choose whether your site represents a organization or a person.
You will be asked to enter the name of the organization and your organization’s logo if you choose Organization.
If you choose Person you will be asked to enter the person’s name.
Be sure to enter the social media profiles for your website. If this website is for a organization then enter your organization’s social media profiles. You don’t have to enter all of them, you can pick the ones that you want to promote.
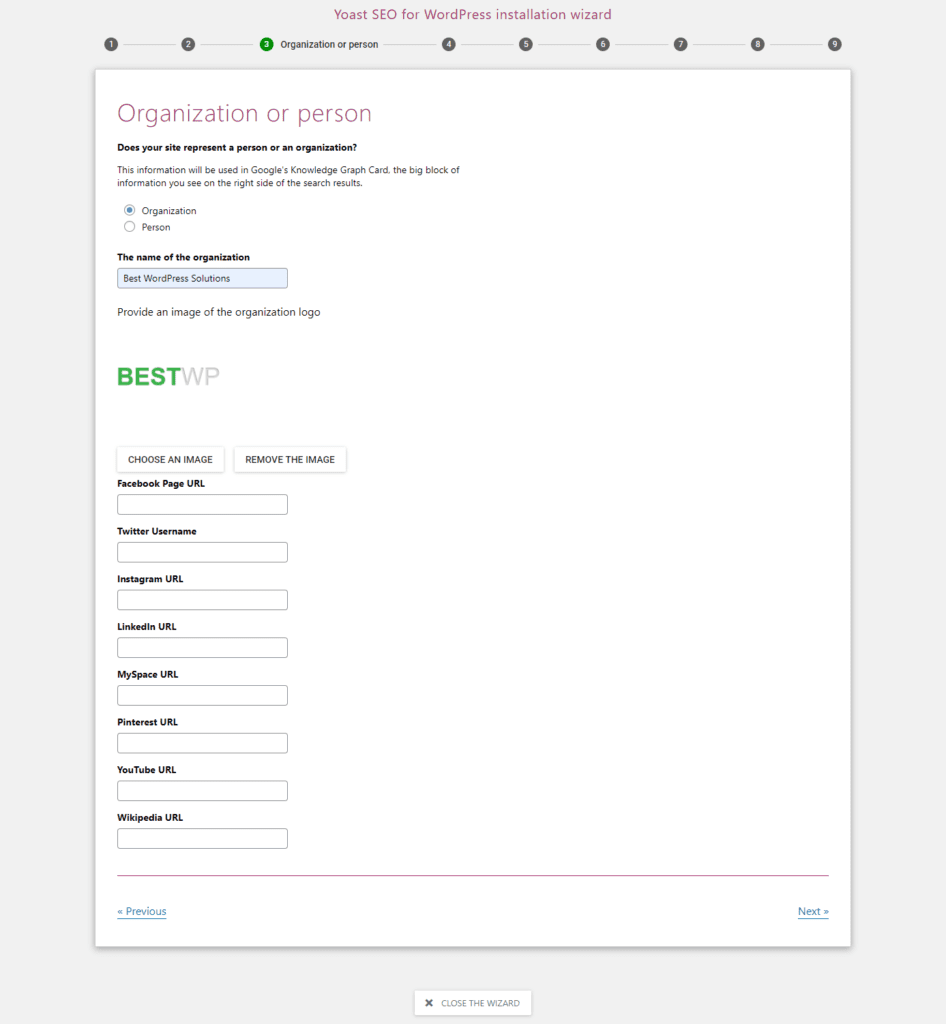
With the information you provide in this section Google can generate a Knowledge Graph Card. These cards definitely catch the eye so every piece of information helps:
Section 4: Search Engine Visibility
In this section you can choose whether or not to have certain types of content indexed in search engines. You can leave this section at default setting, which is recommended, unless you are experienced user and know what you are doing.

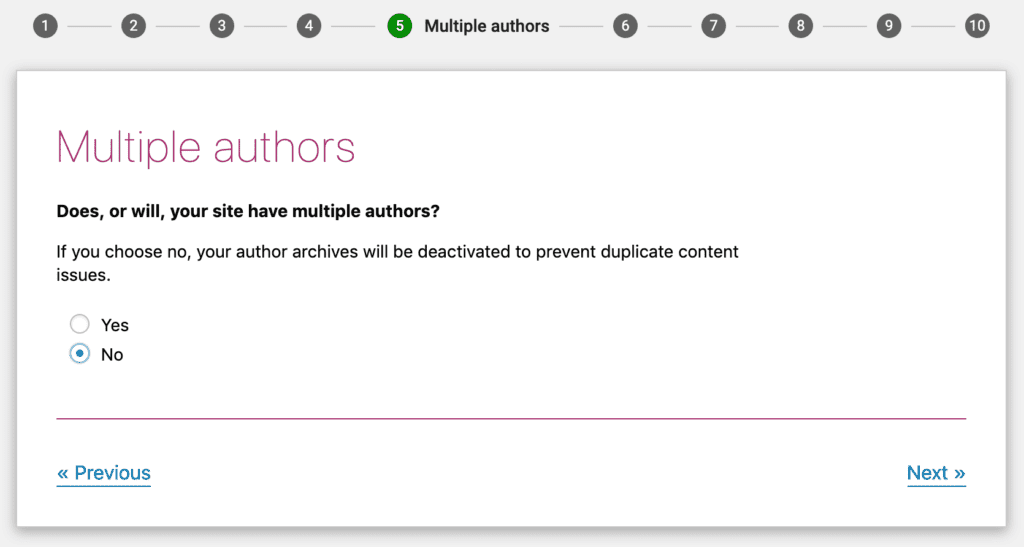
Section 5: Multiple Authors
Yoast will automatically mark your author archives as noindex to avoid duplicate content if you are the only author. Noindex tells search engines not to index a page.
If you plan on having multiple authors than please choose yes in this section so specific author archives will show up in Google Search results:
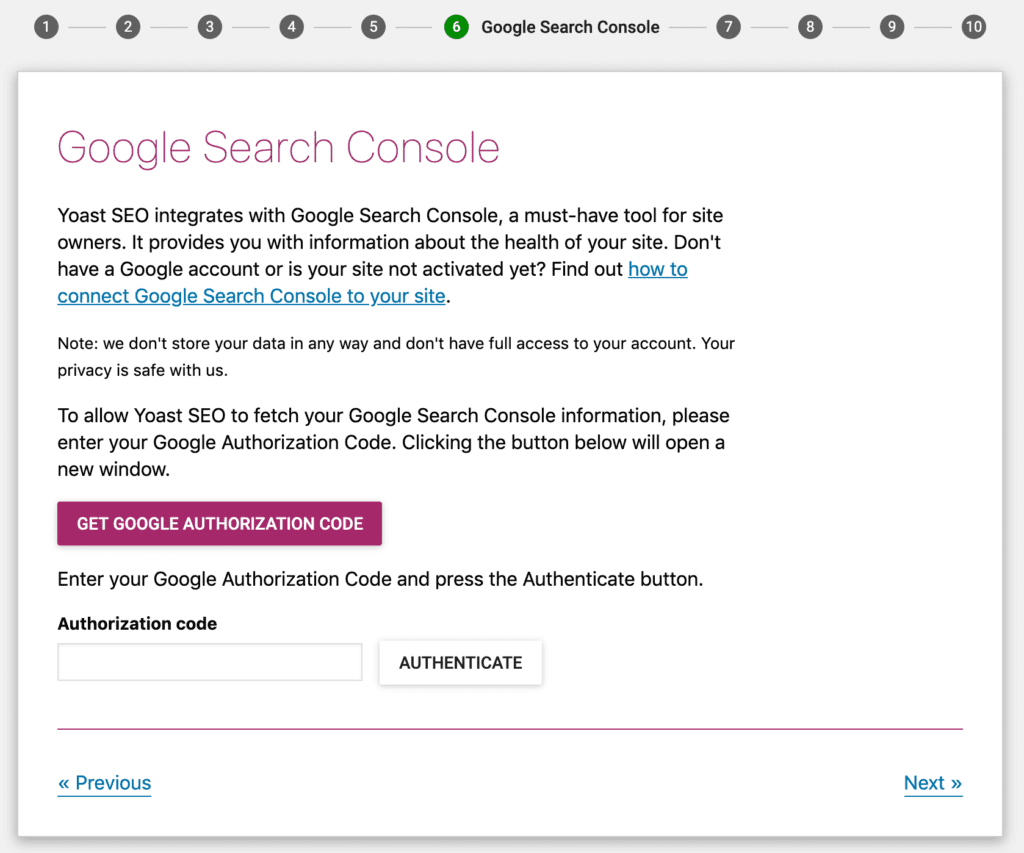
Section 6: Google Search Console
Google search Console is a tool that allows you to view how your site works in Google organic search. You can allow Yoast to import information by clicking the Get Google Authorization Code and entering the code here, if you are already using Google Search Console.
By using Google Search Console you can see how Google is indexing your site and make corrections if need be. You definitely need to use this tool but you don’t need to set it up at this time if you wish. Its not a requirement to using Yoast:
Section 7: Title settings
The Title is the main headline that appears in Google search results and the browser tab of visitors to your site:
You can control how your title looks in search results. Yoast SEO makes your title look like this by default:
Post Name *Separator* Website Name
You have the ability to choose:
- Your website name
- *Separator*
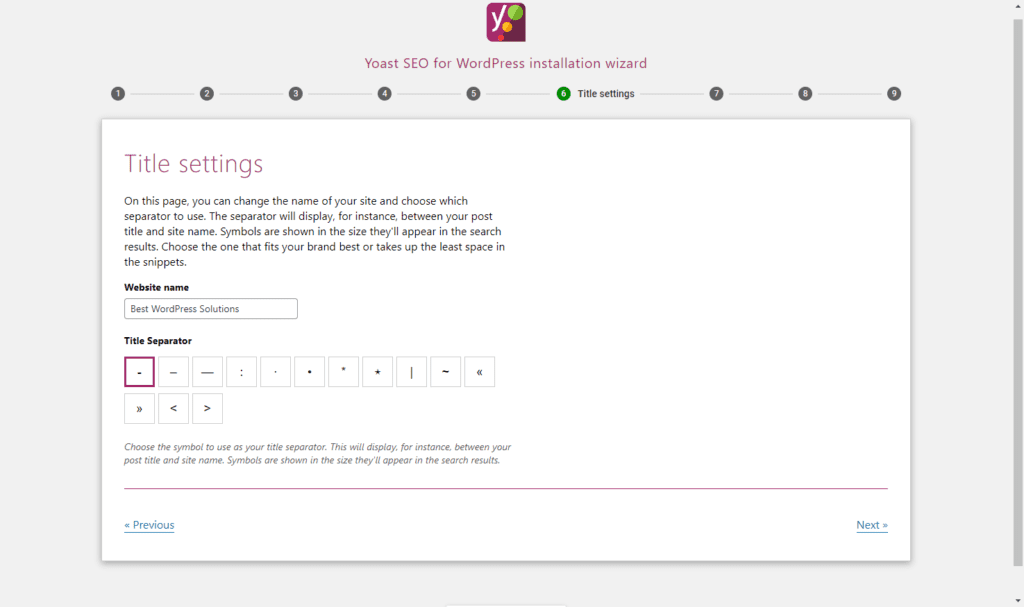
For Example, if the title of your post is “How to Configure Yoast SEO to Boost Rankings Free 2021” and with the settings we chose above your title would appear in Google looking like this:
How to Configure Yoast SEO to Boost Rankings Free 2021 - Best WordPress Solutions
Finish Configuration Wizard
The next sections 8 and 9 are not mandatory, these sections are attempts by Yoast to get you to sign up to their newsletter, purchase Yoast SEO Premium, keyword research training, or plugin training. Its up to you if you would like to sign up for any of these.
Section 10: Success!
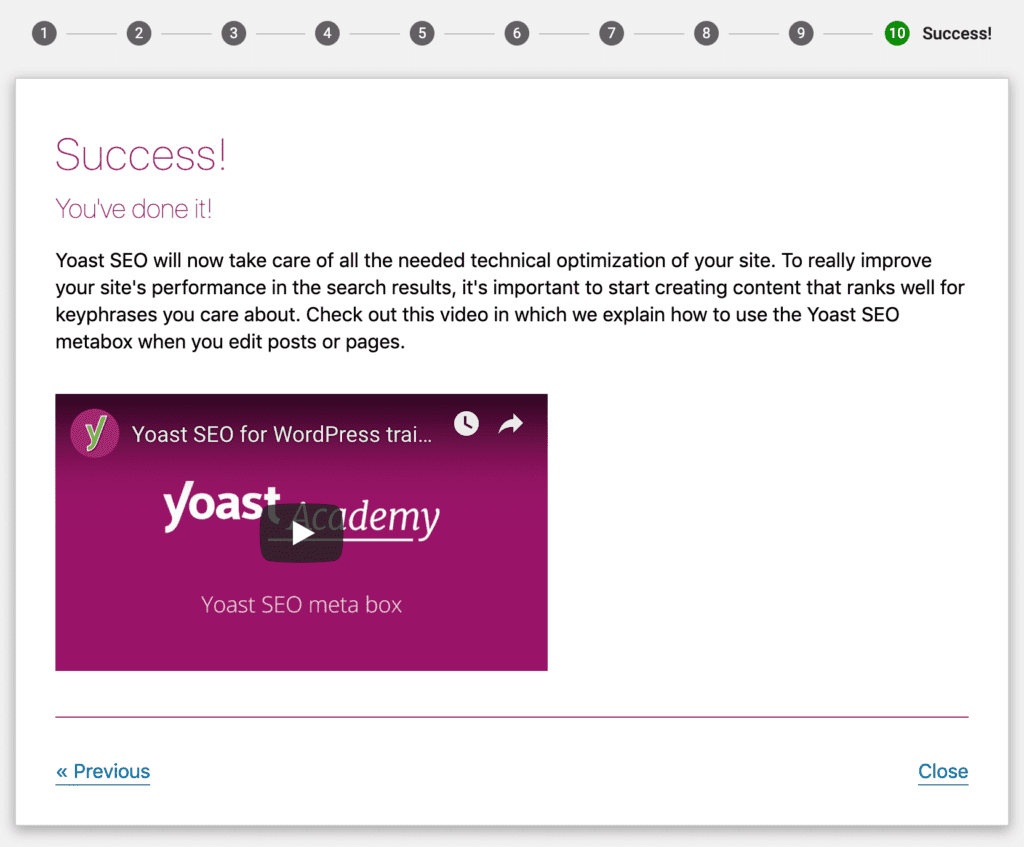
You can now click Close!
Yoast SEO Meta Box
The Yoast SEO meta box will be used on a daily basis because of the functionality it provides.
The Yoast SEO meta box helps you by:
- Analyzing your content for SEO quality and SEO readability
- Gives you the ability to configure settings for how content functions in social media and Google
Underneath the WordPress editor is where you will find the meta box. Its location will vary a bit based on what plugins and themes you have installed.
You can find it on the right hand sidebar as well if you are using the block editor.
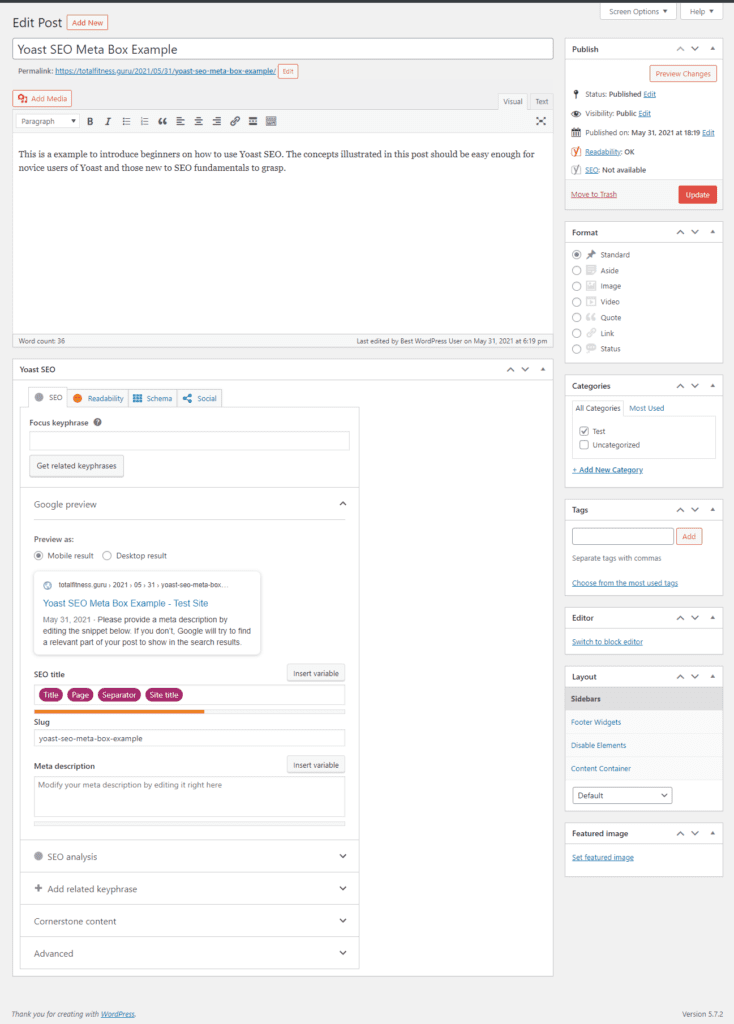
The Yoast Seo meta box has four tabs which we will use to optimize content:
- SEO
- Readability
- Schema
- Social
Yoast SEO Tab
The SEO tab is mostly about how well your content is optimized for search engines.
The first area in the SEO tab is the Focus Keyphrase.
You can enter a Focus Keyword to optimize content for. You should perform some basic keyword research to find keywords that people are searching for, namely in Google. When you enter that keyword in this box Yoast will perform an analysis of your content and let you know how optimized your content is for that specific keyword.
Yoast will let you know what you are doing well and provide suggestions on improvement. Yoast SEO will also help you to find related keyphrases by hitting the Get related keyphrases button.
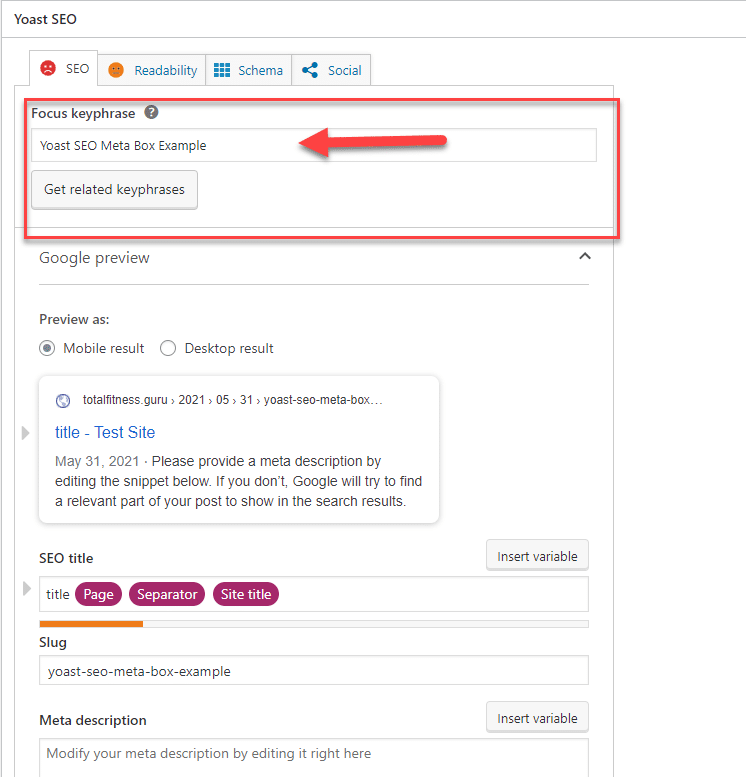
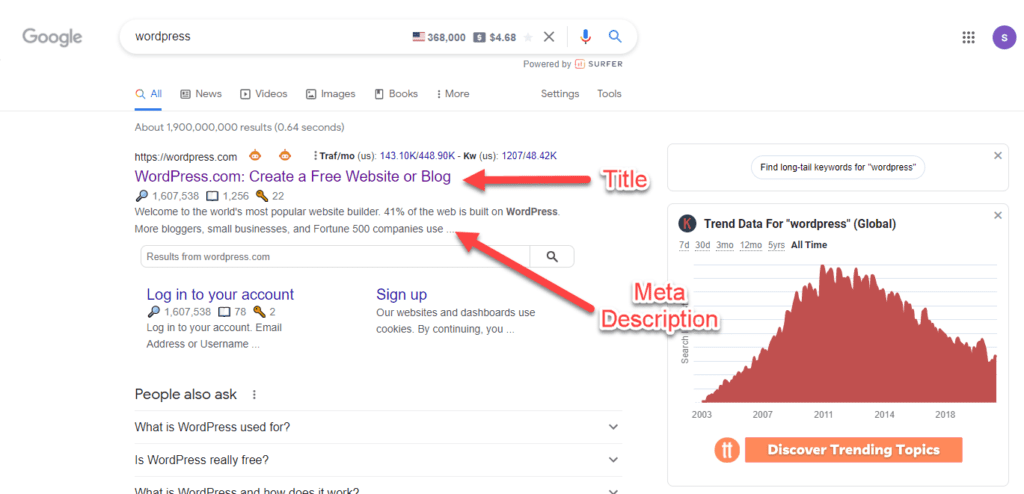
Then you will see the Snippet Preview.
You can click in the Meta Description box to manually change it. You will see a live preview at the top as you edit the information.
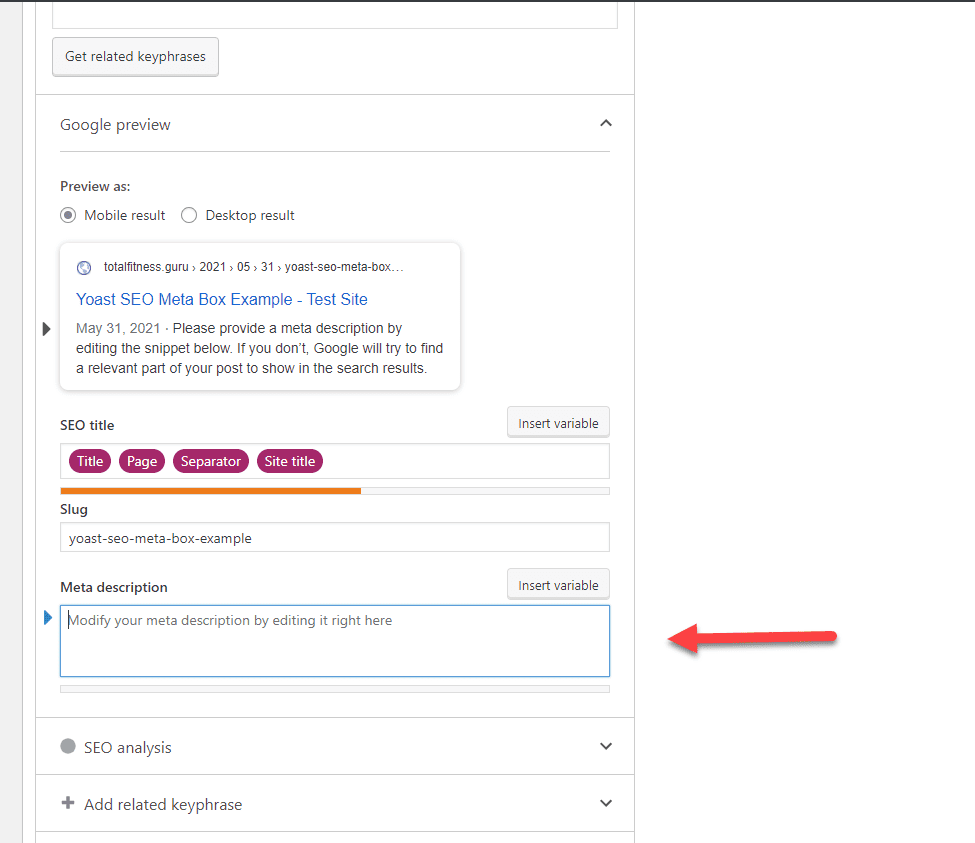
This info is important as it’s a preview of exactly how your snippet will appear in Google’s organic search result:
Yoast Readability Tab
Yoast tries to apply this same concept to humans in the Readability Analysis area. In this area Yoast tries to ascertain how readable your content is to human visitors and then makes suggestions on how you can improve the readability of the content if need be.
These suggestion are a good high level guide but the suggestions aren’t perfect so don’t feel like you have to get a perfect score here.

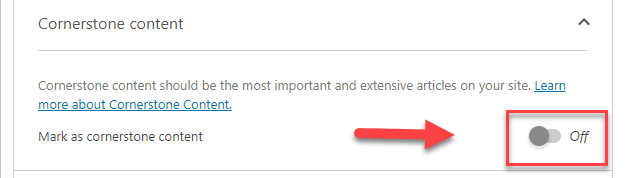
If you go back to the SEO tab in the Yoast SEO meta box and scroll down to the Cornerstone content area you an choose whether or not to designate this content as cornerstone.
Cornerstone content is the core of your website. It consists of the best, most important articles on your site; the pages or posts you want to rank highest in the search engines. Cornerstone articles are usually relatively long, informative articles, combining insights from different blog posts and covering everything that’s important about a certain topic.
By default the option to Mark as cornerstone content is in the off position:
If you would like to designate this content as cornerstone then click the switch to on:
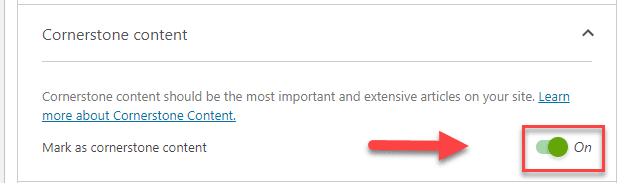
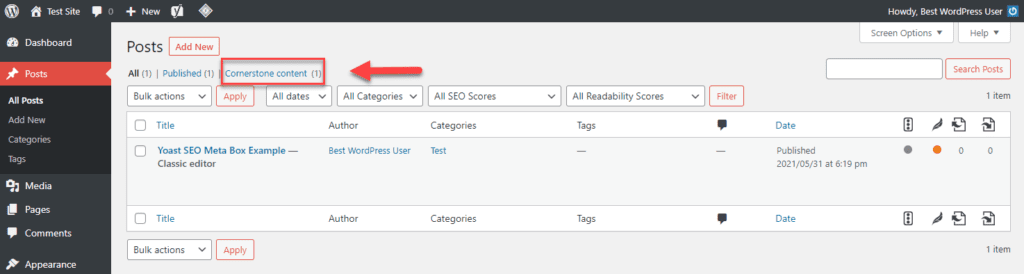
Its good practice only to choose your best content, the posts and pages that you will keep up to date, as cornerstone content. In the posts and page lists you can easily sort by your cornerstone content. This ability makes it easier to manage them.
Yoast SEO Social Media Tab
You can manually set how your content will look on Twitter or Facebook using the Social tab:
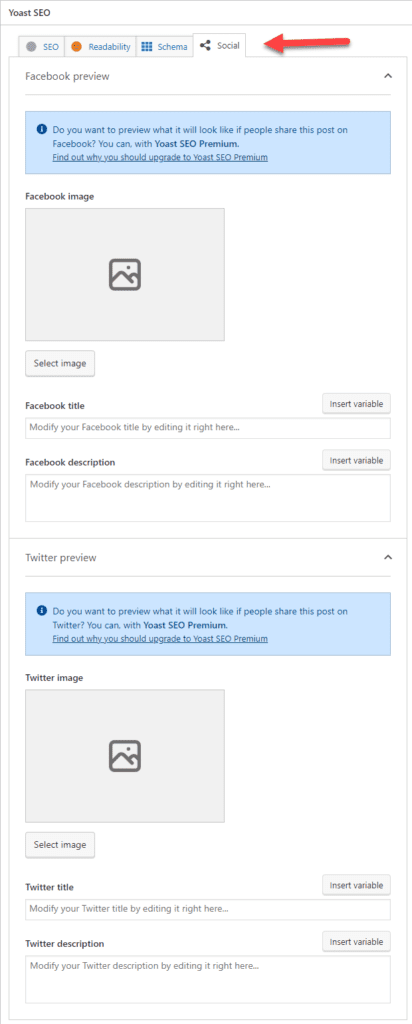
If you don’t have the premium version of Yoast the functionality is reduced unfortunately and you will see those annoying ads to upgrade to premium. The free version is more than adequate though for most use cases. If you have extra bucks to spend you can always upgrade anytime.
Most of the time, you don’t need to manually configure this information for each post because Yoast SEO will automatically generate it based on:
- Your SEO title
- Your content’s featured image
You can override those defaults though if you choose to.
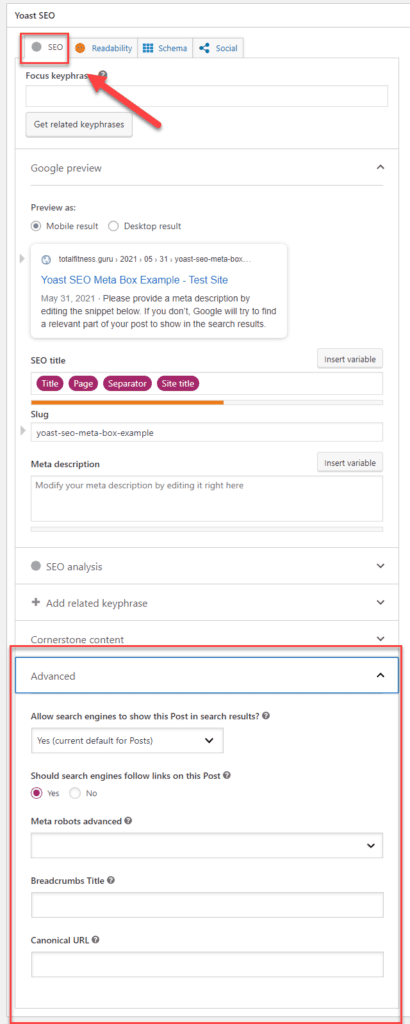
Yoast SEO Advanced Options
You wont have a reason to look at the Advanced area, most of the time, but if you want to:
- Stop Google from indexing this specific piece of content, keeping it out of search results
- Specify a canonical URL to stop duplicate content
Then this is the place to do it.
To get to the Advanced options go back to SEO tab, scroll down and click Advanced dropdown to reveal options:
Yoast SEO Dashboard
Now that we have the configuration of Yoast out of the way and have a good understanding of the meta box we can take a look at the dashboard.
Yoast will alert you to any errors or potential issues on the main page of the dashboard under General.
As you can see we have no notifications or problems being reported at this time:
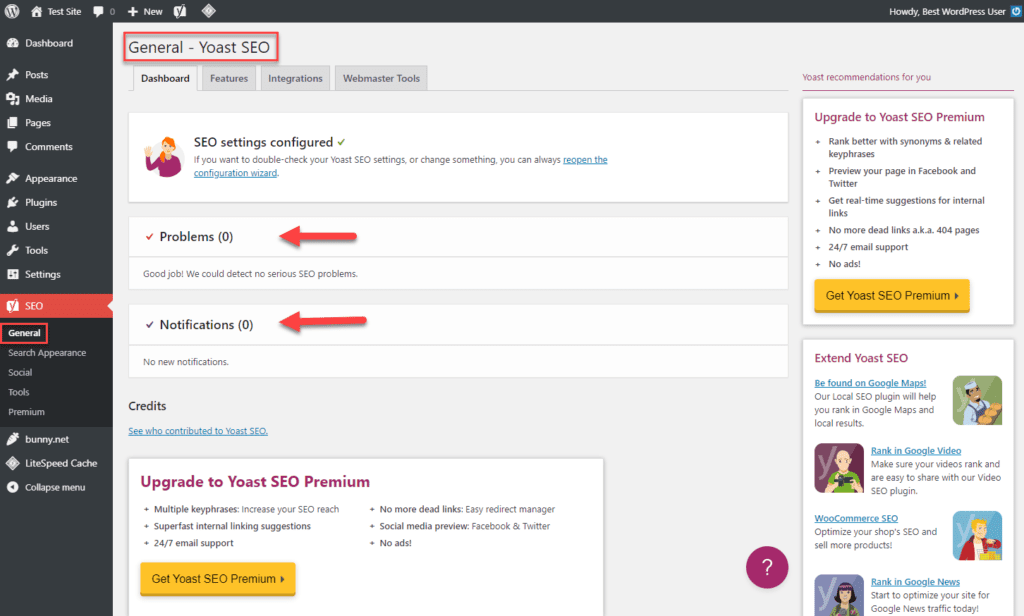
If you were to have notifications in this area Yoast would give you tips on how to fix them. You also have the option to dismiss notifications and alerts if you do not want to address them.
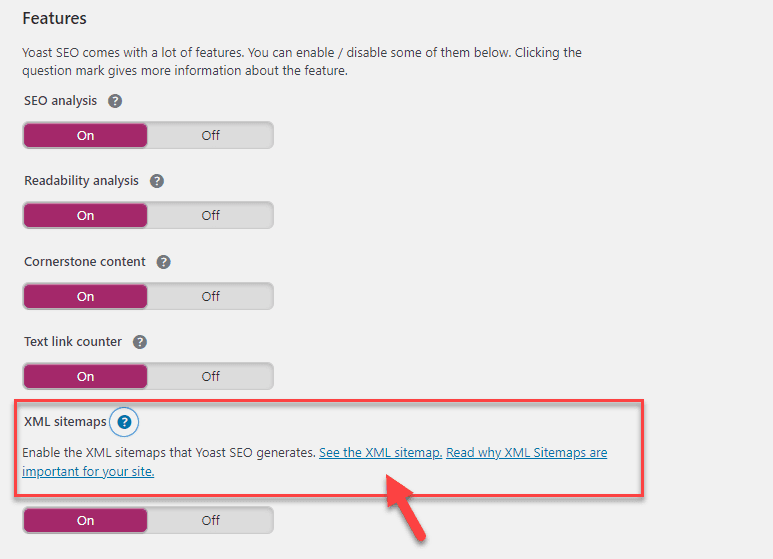
Features Tab
In the Features tab you can enable or disable specific features of Yoast SEO. For example, you can turn off any option that you don’t find useful in this area:
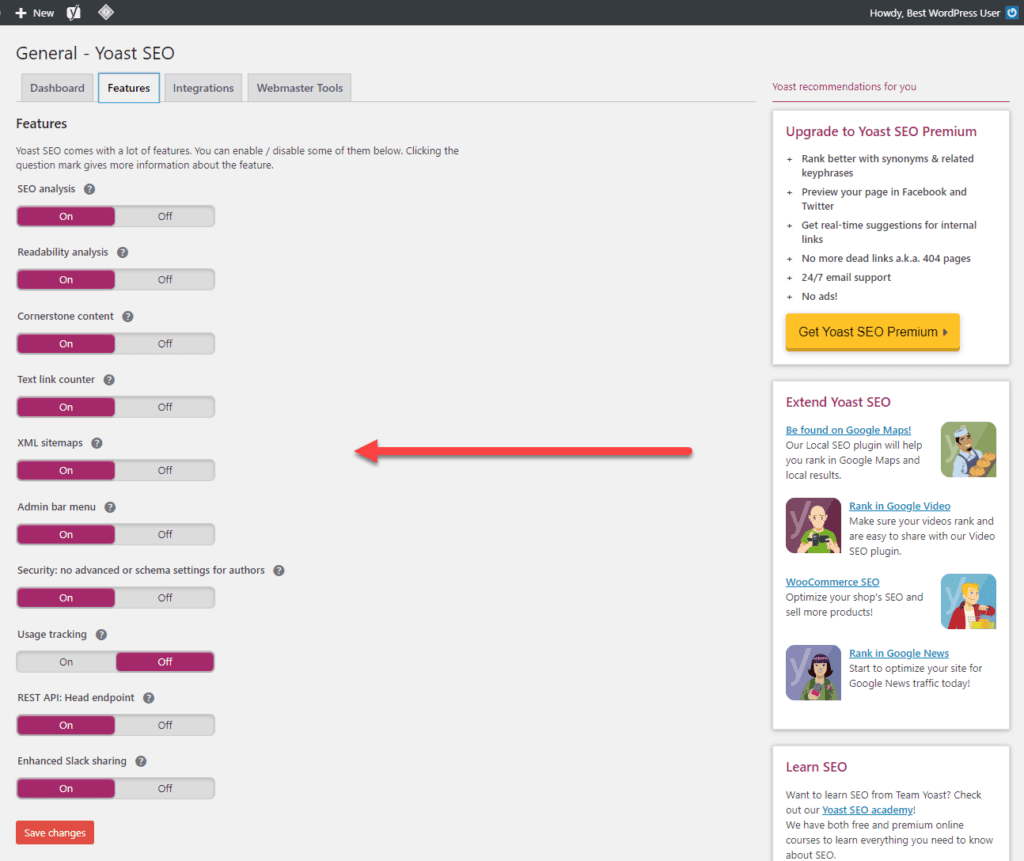
Looking for your XML sitemaps? Yoast SEO can help you automatically generate an XML sitemap that you can submit to search engines.
In the newer versions of Yoast SEO, there is no longer a separate section for this. But you can still find a link to your XML sitemap by expanding the XML sitemaps tooltip and clicking on the “See the XML sitemap” link.
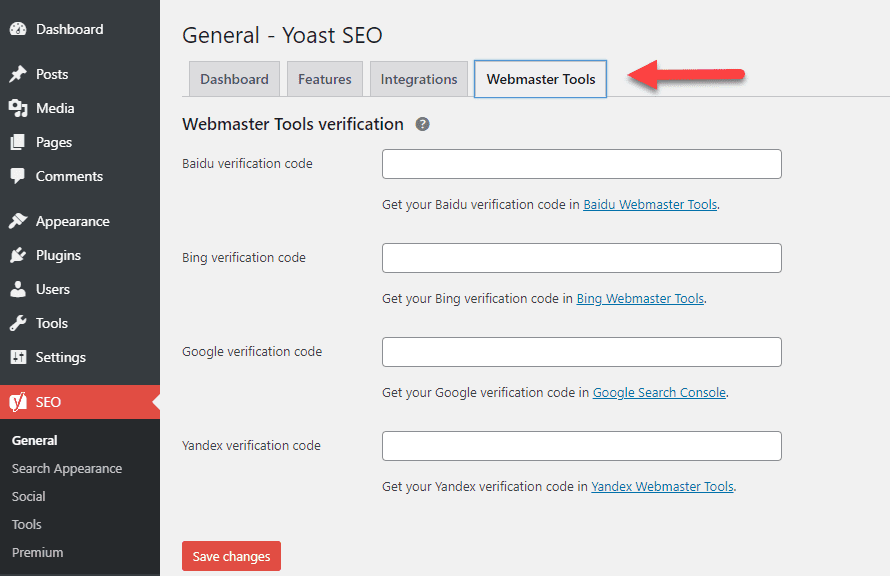
Webmaster Tools Tab
Yoast SEO can help you to verify your site with various search engine’s webmaster tools in this tab:
Summary
We’ve come a long way in such a short time in this adventure together from installing Yoast SEO, the leading SEO plugin for WordPress, to configuring it. You now have the power and tool you need to optimize your articles for readability and gain a boost in search engine rankings. You still have much to learn however. Stay tuned for our next guide on Yoast Advanced Features Configuration. I guarantee it will be worth the time to read.
If you enjoyed this post or have anything you would like to add/share please feel free to leave a comment. Check out our latest post on starting a blog or ecommerce site. We also offer a pretty good WordPress Maintenance Plan if you need hep running or setting up your WordPress blog, SEO included. Have troubleshooting issue? Our Troubleshooting Service may be just right for you. Our WordPress shared hosting or VPS plans are not too shabby either!