Last Updated on December 28, 2022 by Steve
This tutorial will cover the steps needed to set up StackPath CDN with LiteSpeed Cache on WordPress with your own custom domain.
Requirements
- StackPath CDN Account.
- WordPress website with LiteSpeed Cache installed.
Tips
- LiteSpeed Web Server is not neccessary to use LSCache’s CDN support. This feature will also work on Apache, nginx or any other web servers.
- There will be no downtime during the process, if each and every step is followed correctly.
- StackPath can be used in conjunction with QUIC CDN. Use QUIC CDN to serve your dynamic pages while StackPath handles the static files. To set up QUIC CDN, please see the documentation These two solutions are supported together out of the box without any special steps.
This tutorial will be covered in two major parts:
1. Configuring the CDN itself within your StackPath account
2. Configuring LiteSpeed Cache to work with the CDN.
Setting up the CDN
Create a CDN Site
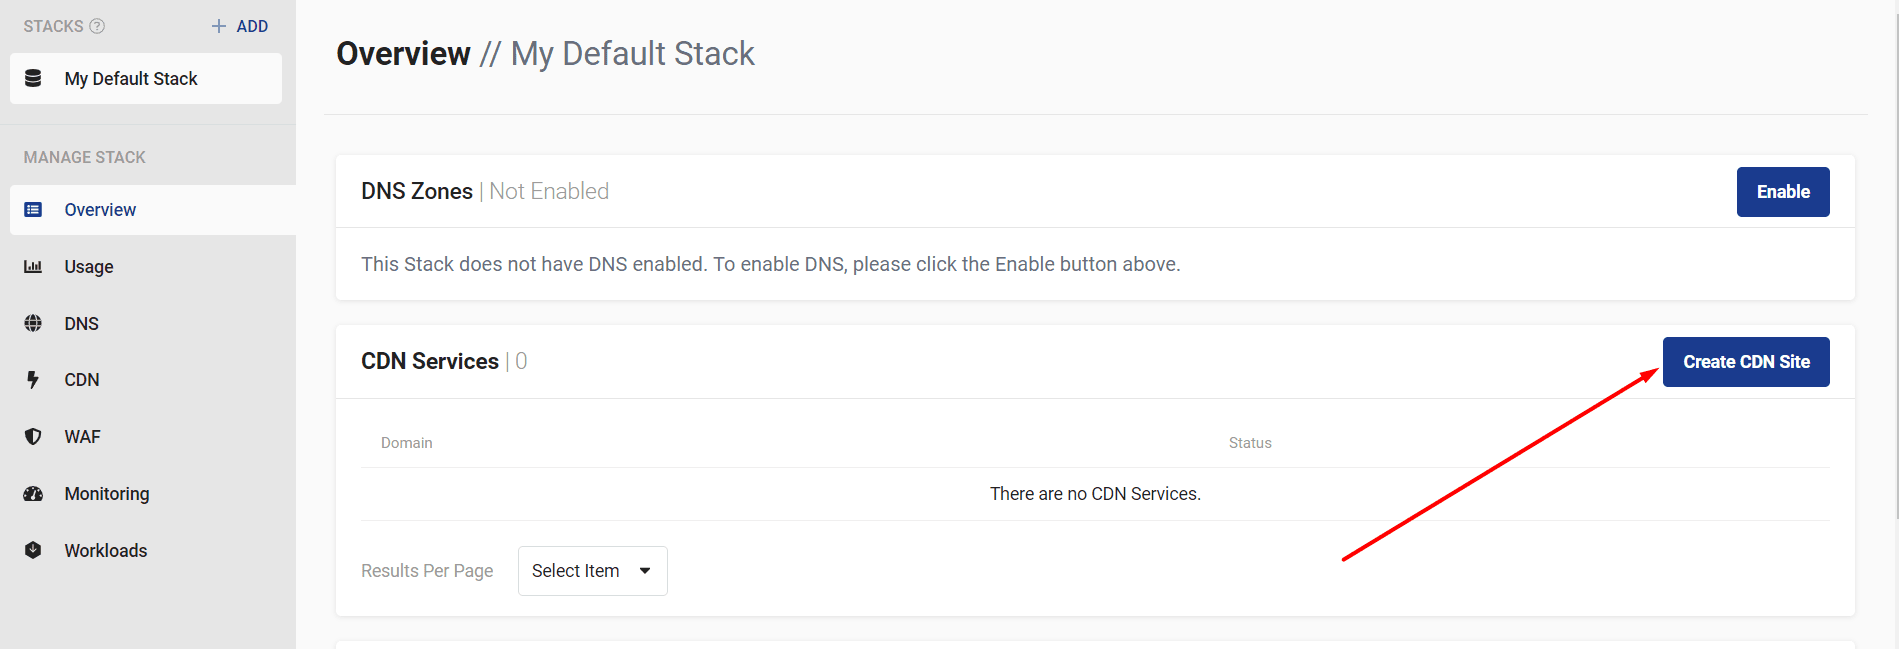
Log into your StackPath account, complete the registration process, and you will be taken to the Overview tab. Press the Create CDN Site button.
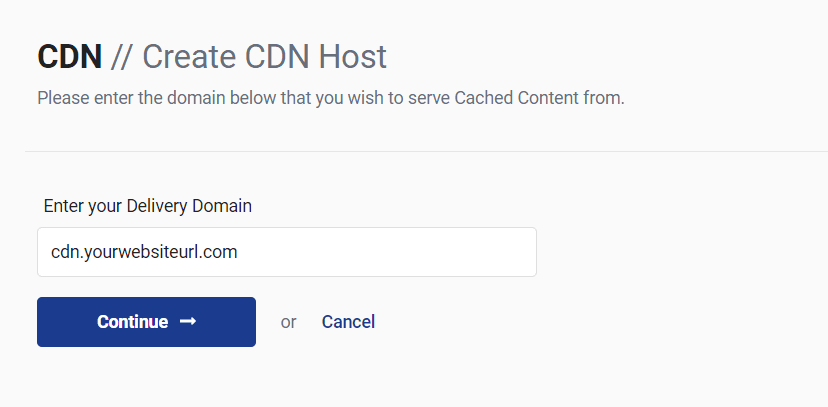
You will be asked to Enter your Delivery Domain. Choose a subdomain where you will serve your static files from. A common choice is cdn.yourwebsiteurl.com.
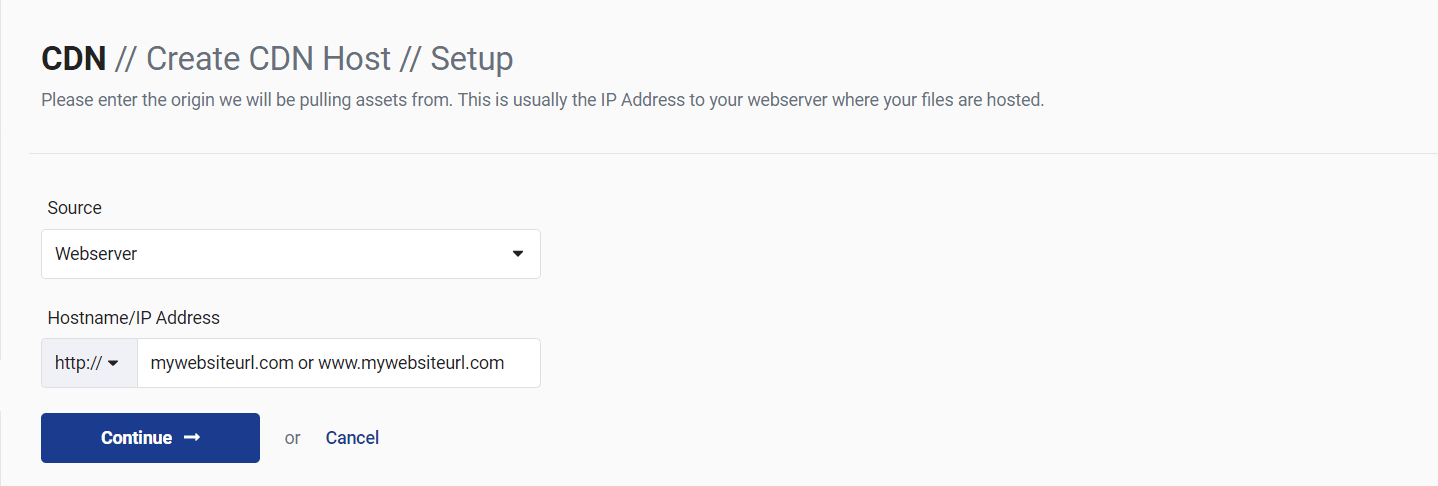
Set Source to WebServer and Hostname/IP Address to your site’s domain.
Please enter your site’s default domain. If your website currently opens on https://bestwordpress.solutions, Choose https and enter bestwordpress.solutions in the domain. Open your domain in a browser once to verify.
Once your CDN site has been created, you will be given a CNAME URL. Make a note of this value.
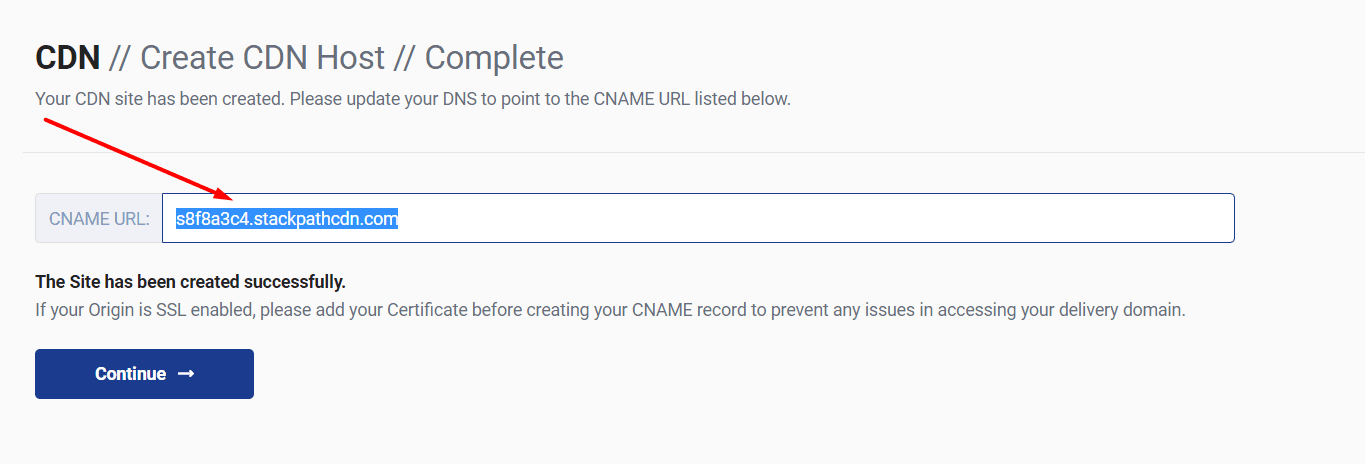
Log in to your domain registrar and create a CNAME record with the host cdn.yourdomain.com or whatever you chose during the initial setup, and use the CNAME URL given to you by StackPath, like so:
cdn.yourdomain.com CNAME IN TTL(Minimum Possible) xxxxxxx.stackpathcdn.com
Be sure to replace xxxxxxx with your CDN site’s actual subdomain.
Setting up SSL and DNS records
Return to the StackPath dashboard by clicking the Overview button.
Click on your newly-created CDN site, go to Edge SSL, and click the Generate Free SSL Certificate button.
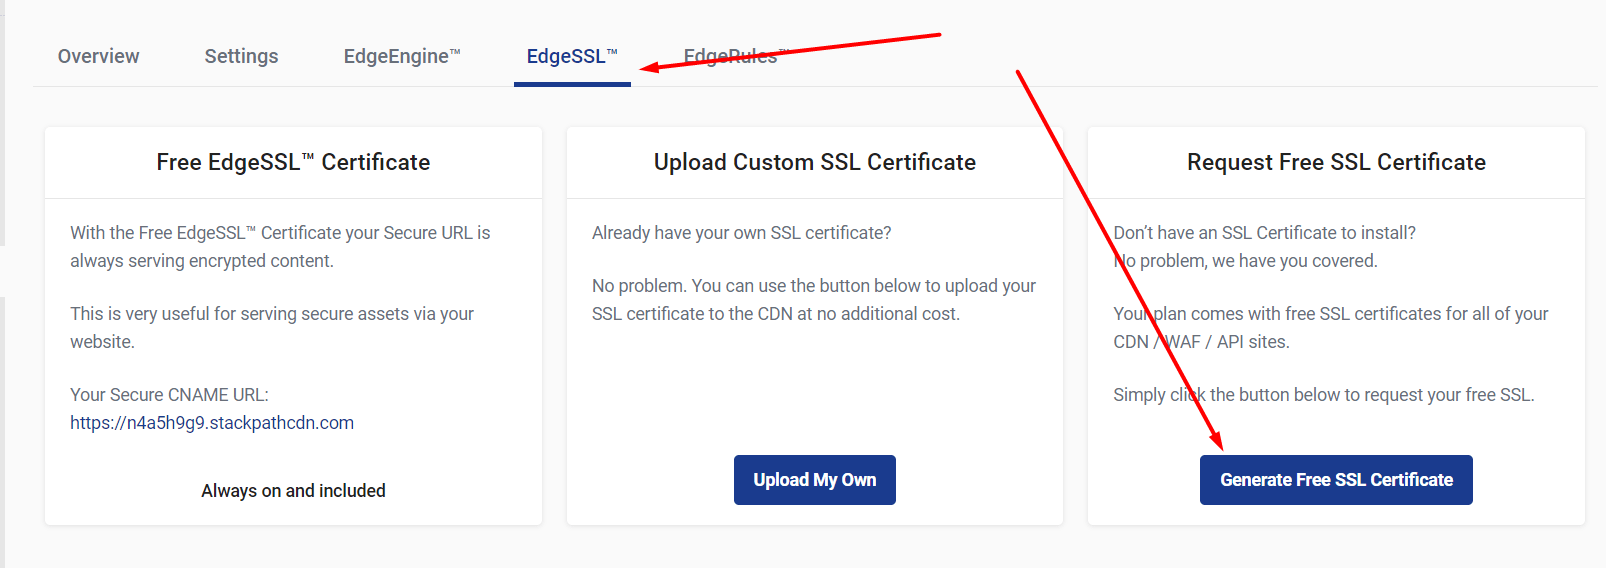
Select your delivery domain and click Continue.
You will recieve another CNAME record that you must create in order to validate SSL for your custom created CDN subdomain (cdn.yourdomain.com)
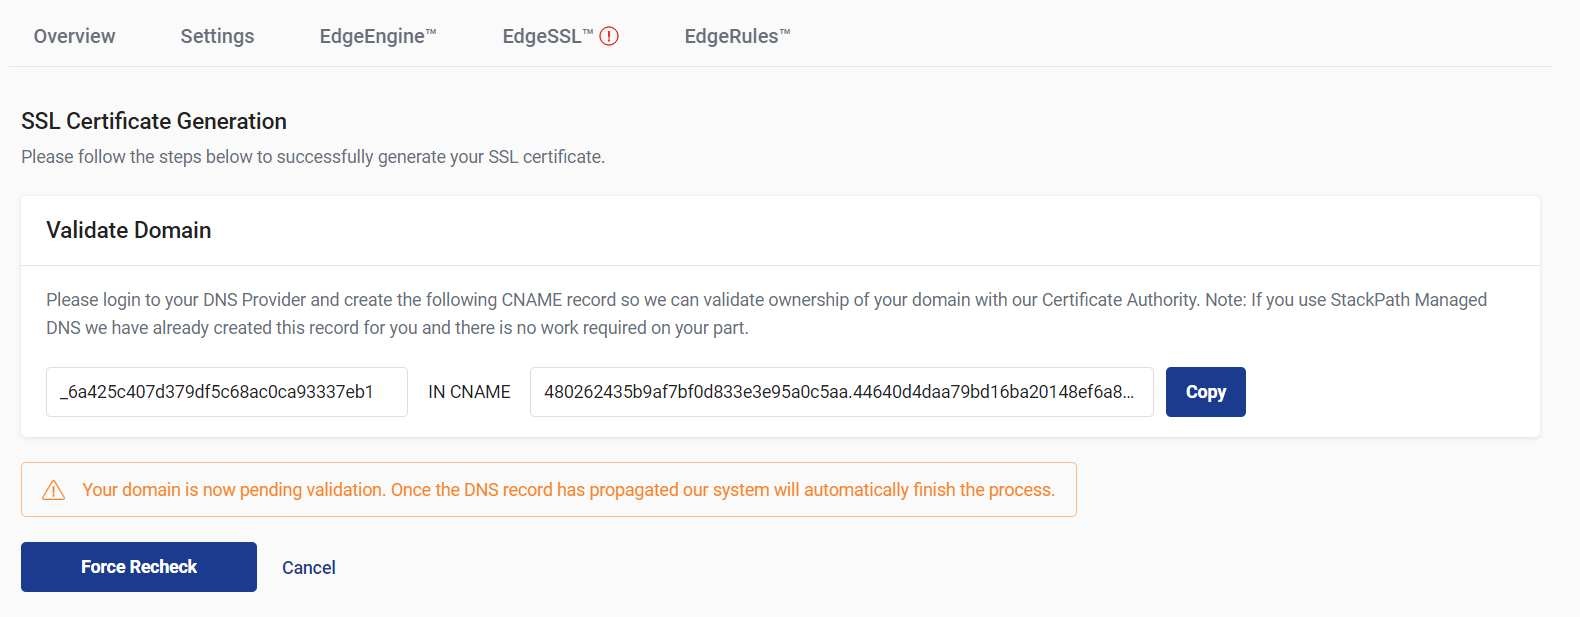
You now have two CNAME records. One is to point your custom domain to StackPath CDN and the other is to verify domain ownership for SSL.
Log into your domain registrar and add the 2nd CNAME record which is for SSL Verification, exactly as shown by StackPath.
Note: This record should be created for the delivery subdomain and not the root domain. e.g, If your main domain is website.com, but in the delivery subdomain you have entered cdn.website.com, This CNAME record should be created as _6a425c407d379df5c68ac0ca93337eb1.cdn.website.com CNAME IN TTL(minimum) ****.cnamerecord.com
Once the CNAME record is added, you can wait for 5-10 minutes and then click the Force Recheck button to validate your domain. You should see an SSL Certificate inside the Edge SSL tab now.
If it is taking sometime, it’s fine to move ahead. You can re-verify at the end.
Setting up Mandatory CDN Settings
Return to the Overview tab, re-select your newly created CDN site and go to the Settings tab.
In this page, you need to set up two things:
- Host Header: This value should be your real domain and not the delivery subdomain. For example, if you use your website like
yourwebsite.com, selectyourwebsite.comthere. If you use your website likewww.yourdomain.com, selectwww.yourwebsite.com. Click on Add Custom, if you don’t see the desired option in the list. - Pull Protocol: This value should also be selected based on your website’s default. If you use HTTPS by default select
HTTPS. Otherwise, leave it onHTTP.
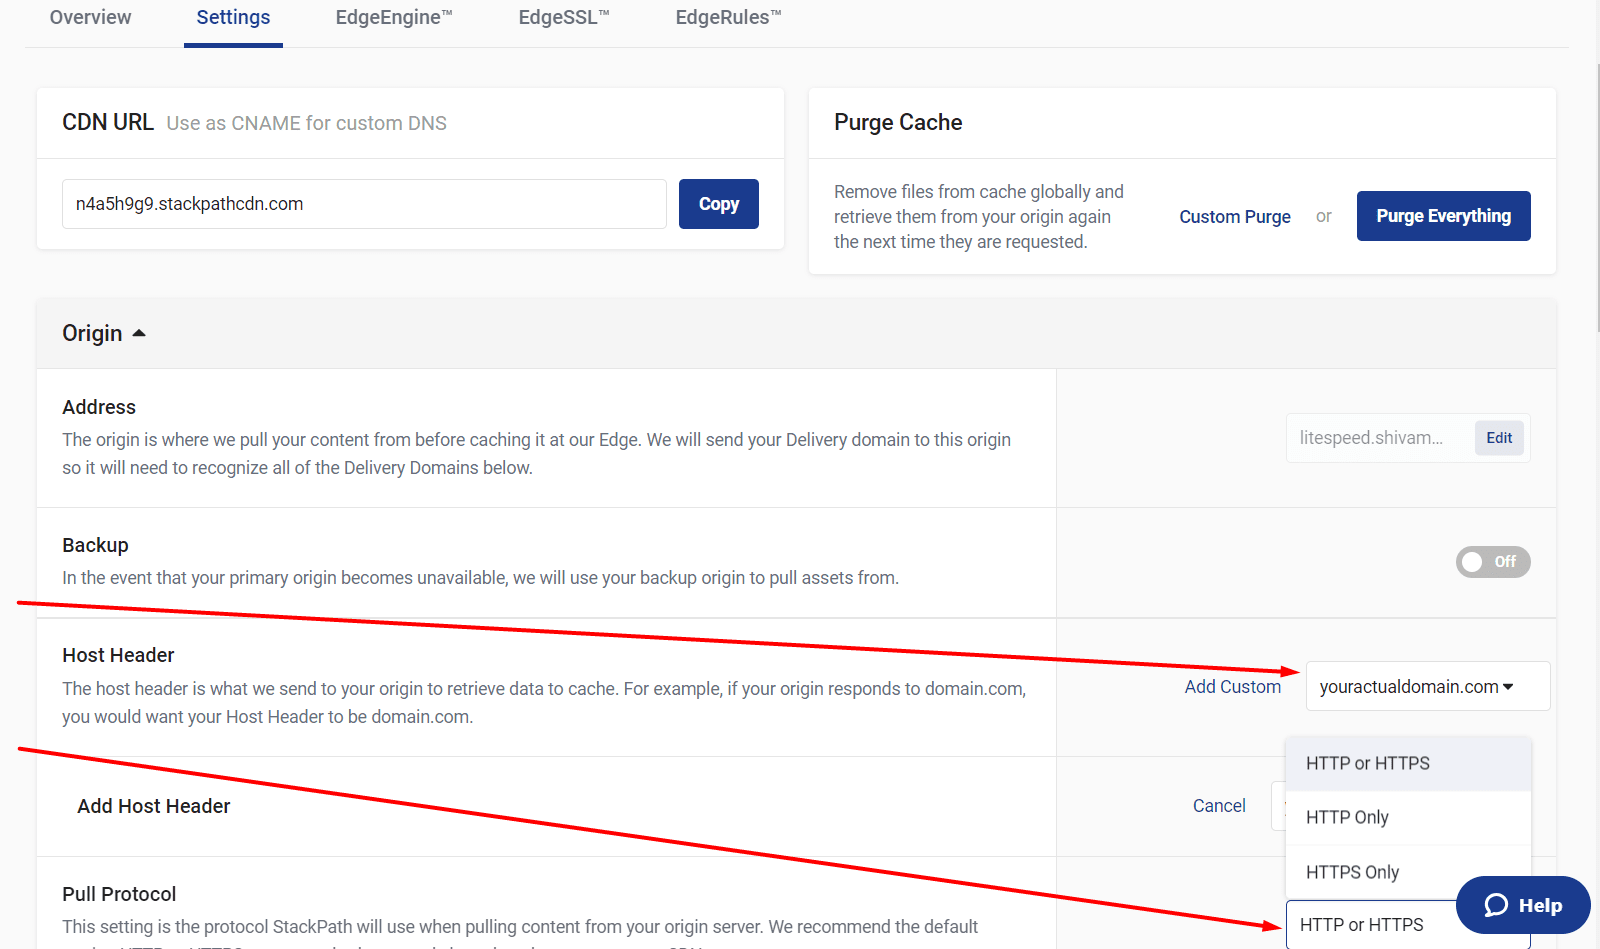
Other settings below are related to caching properties and are best decided by the website owner. It is also okay to leave them set to their defaults if you’re not sure.
Setting up the LiteSpeed Cache Plugin
In the second and the final step, we will setup the LiteSpeed Cache plugin to serve static files using StackPath.
Log into your WordPress Dashboard, navigate to LiteSpeed Cache > Settings > CDN
Note: If you do not see the CDN tab, click on Show Advanced Options to enable it.
Set Enable CDN to ON. In the CDN Mapping section, set CDN URL to the delivery subdomain you created in the previous steps, i.e cdn.yourdomain.com. Set Original URL to your original default domain that you use with your WordPress site (www or non-www).
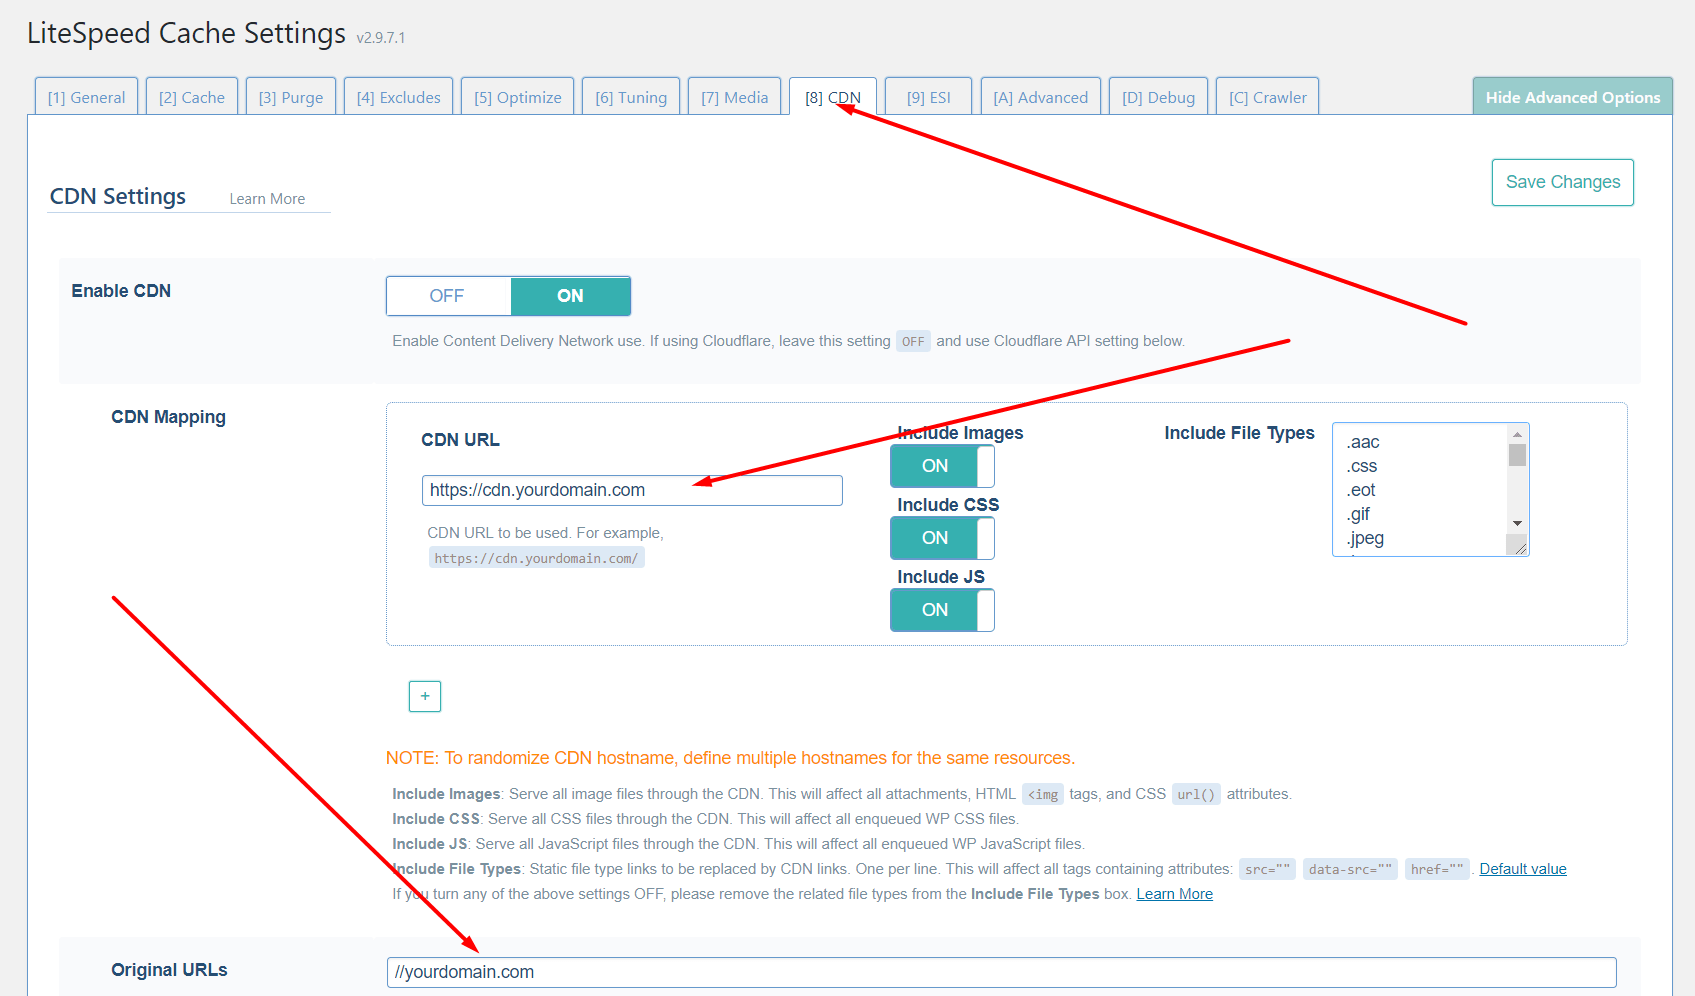
Do not click the “Save Settings” button yet.
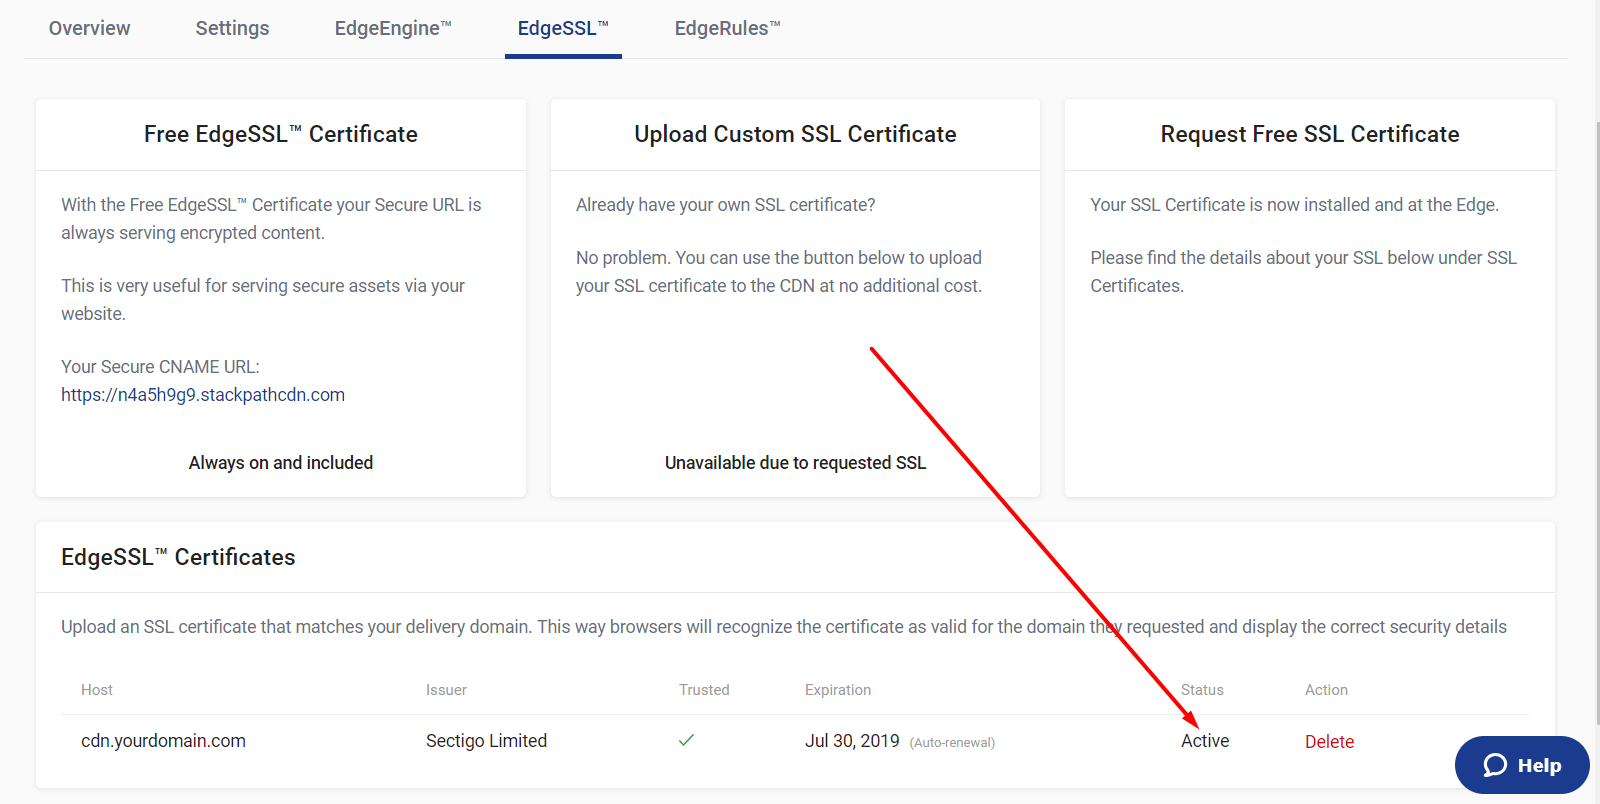
Before saving the settings, re-verify everything so as to avoid any downtime. Your SSL should be issued and should be showing as active in your EdgeSSL Settings inside your StackPath Account, and Host Headers and Pull Protocol should be set perfectly.
You can also verify if the CDN settings are correct by simply going to your website and trying to load any image on your website using the delivery subdomain. For example, if your logo loads from https://yourdomain.com/logo.png, manually open a new tab and open the URL as https://cdn.yourdomain.com/logo.png, and see if it loads correctly.
If everything looks right, click Save Settings, and then Purge – LSCache via the LSCache logo on the Admin bar.
CDN setup is complete!
Verify Your CDN is Loading Correctly
Visit any page on your site. View the page source by using CTRL + U or the right click menu. You should see your static files being served from cdn.yourdomain.com.

Summary StackPath with LiteSpeed Cache
This completes your website’s setup with LiteSpeed Cache and StackPath. Including a CDN with LiteSpeed Cache can significantly improve performance. Let us know your feedback or any problems you may experience. Hope you found this article helpful.