Last Updated on December 28, 2022 by Steve
Readily available technology has made it easier to start your own blog
In this day and age it is much easier for the average person to launch their own website/blog. With the right tools like WordPress and a few plugins you can easily start a personal, professional, business or ecommerce blog.
You can easily have your blog up in running in less than half an hour. The catch is writing blog content, this aspect can take much longer. Quality content will help you generate traffic and gain a following.
In this article I will guide you step by step through the entire process while addressing mistakes to avoid, commonly made by beginners to blogging.
Step 1: Pick a topic for your blog
The very first thing you have to do is pick a name and a topic for your blog. It should be a topic you are familiar with and know a lot about. People will follow your blog to gain insight from your expertise.
Your blog should focus on one thing whether it be food, fitness, travel, fashion, business etc. This is what most successful blogs do.
Recommendations for choosing your blog’s topic
- Are you knowledgeable about this topic?
- Are you passionate about this topic?
- Are you learning about something new and sharing that knowledge/experience or process with others?
If this blog is for business purposes it can easily help you attract new clients
Its important to pick a topic for your blog before you go too far. In the long run this planning can help you save time by reducing rework.
Step 2: Choose your blog platform
You need to figure out if you want a free blog or self host your blog. WordPress.com, Blogger.com or even Tumblr.com offer free blogs that anyone can sign up for although I do not recommend this. If you are serious about your blogging, especially if this blog is being used for business purposes you should think again.
These free platforms have many limitations on traffic, monetization opportunities and customizations. These platforms also offer you no control over your blog. If you want more feature/options they will charge you to upgrade. This cost is most often more than it should be.
The best option is to host your own blog
By hosting your own blog you will have no limitations on your content such as pictures, videos, topic etc. You can freely choose the features/capabilities of your blog as well. For example in WordPress by adding plugins and themes you can add any feature or change the appearance of your blog. Free Blogging platforms limit plugin or theme installations, even on their paid upgrades. With all the freedom of self hosting your blog will function better, look more professional and in the long run be more successful. By self hosting your blog you will actually own your your blog too.
WordPress is the leading blog platform by far
There are many blogging platforms out their. Some are easy to use while some have a steeper learning curve. Limitations on features also vary.
Statistically speaking as of 2021 WordPress is the most commonly used blogging platform followed by Blogger, Tumblr, Ghost, and Medium. In my opinion none of the other blogging platforms compare to WordPress.


Benefits of self hosted WordPress blog
- Free to use and open source
- Easy to use with thousands of free plugins and themes
- Large community of supporters/developers
- WordPress is updated and improved continuously/frequently
- By self hosting you will have total control
The cost of self hosting your WordPress blog
The cost is low and to start you will need the following:
Domain Name – To get your own domain name such as www.yourblog.com you will spend around $10/yr depending on the domain.
Web Hosting – This is the service used to host your blog and prices vary from as little as $4/month for shared hosting, Virtual private server can cost more but offer better performance.
At these prices you are looking to spend as little as $50 for a year, not bad for all you get and a great start to your blog’s success. If you decide you no longer want to run a blog you can always cancel your hosting account. Domain names are non refundable but you have the option of not renewing when it expires.
Step 3: Set up your blog with web hosting account and domain name
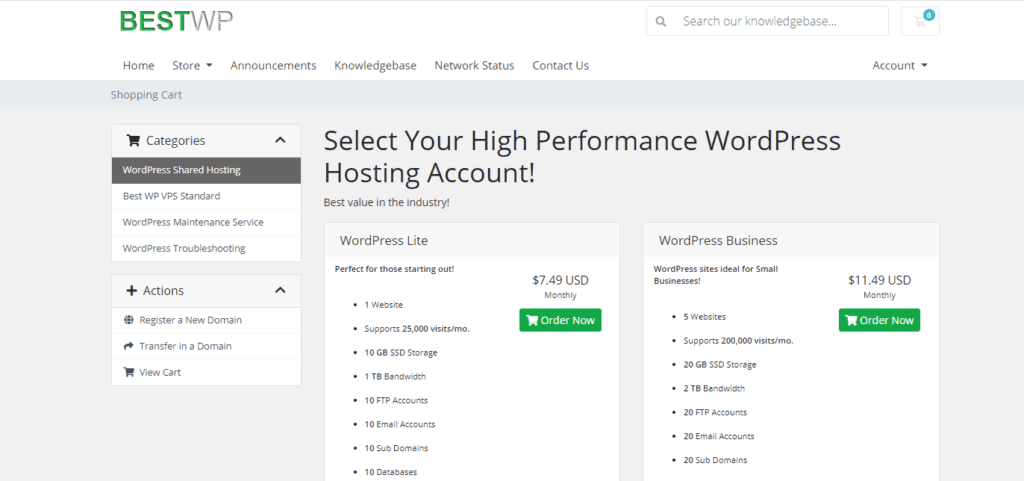
To start setting up your blog you will need to buy your domain name and get your WordPress web hosting account.
(Note: if you already have a domain name and hosting, you can skip this part)
There are many web hosting service providers out there that you can choose from.
From WordPress hosting you will get:
- Shared hosting accounts that get activated instantly for use
- Virtual Private Servers are custom made to your order and can take up to 24 hrs. for provisioning
- Custom domain name with SSL certificate
- One click install of WordPress with WordPress Manager
- Free email included like your.blog@yourdomain.com
- Free premium themes and free premium plugins
- Ecommerce capabilities
- etc.
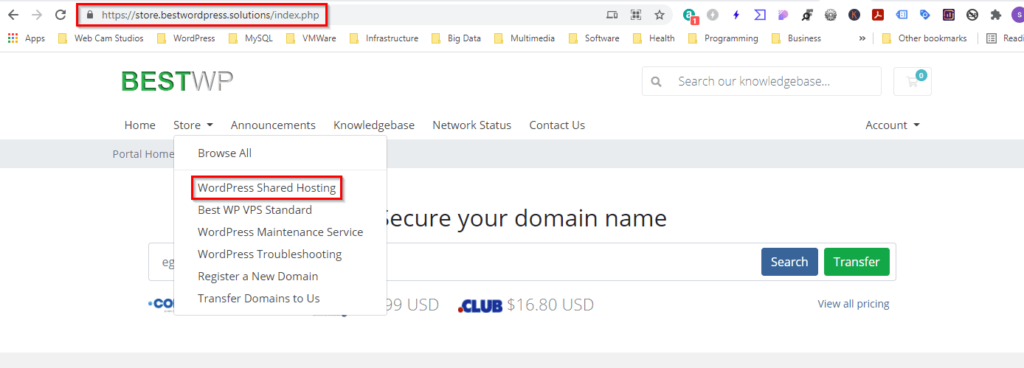
If you choose not to go with us as your self hosted WordPress service provider be sure to choose a host that offers one click install option for WordPress, this will make your life a whole lot easier.
If you would prefer a Virtual Private Server the steps are pretty similar
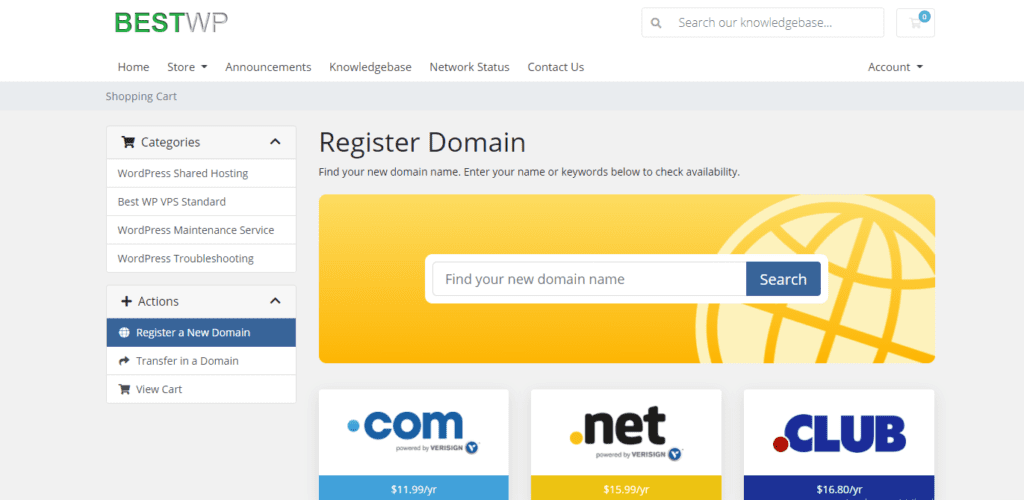
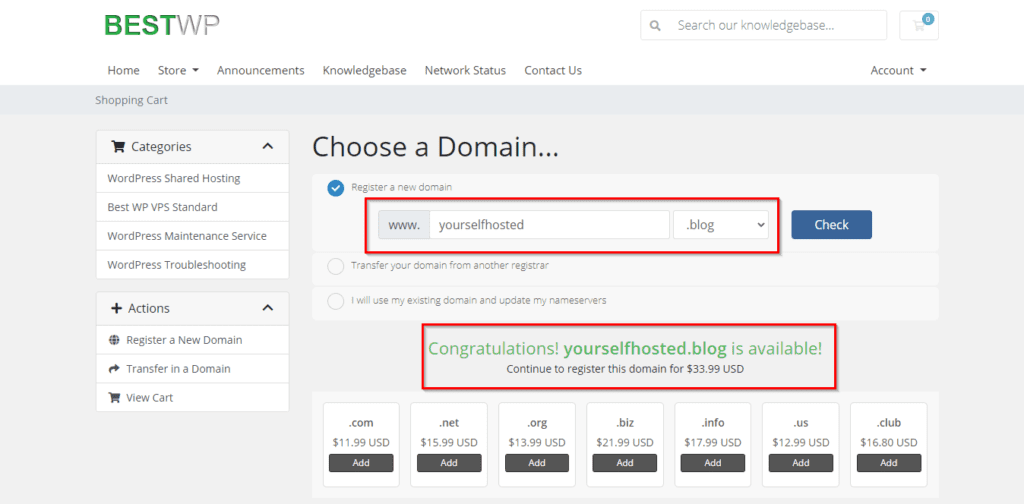
Click the Order Now Button
Search for your domain name
You may also choose to transfer a domain to our servers if you already have one with another host
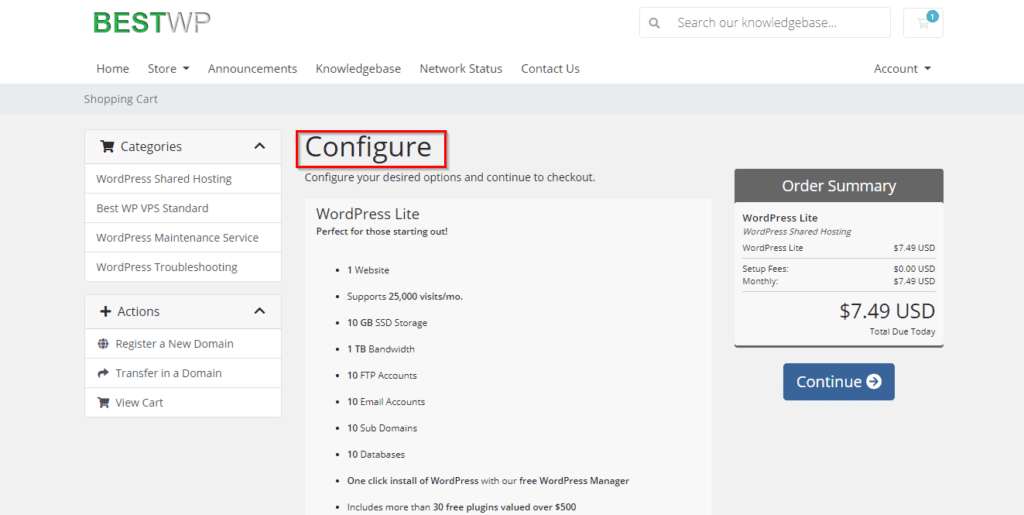
Select additional options to enhance your hosting account. Click continue when finished
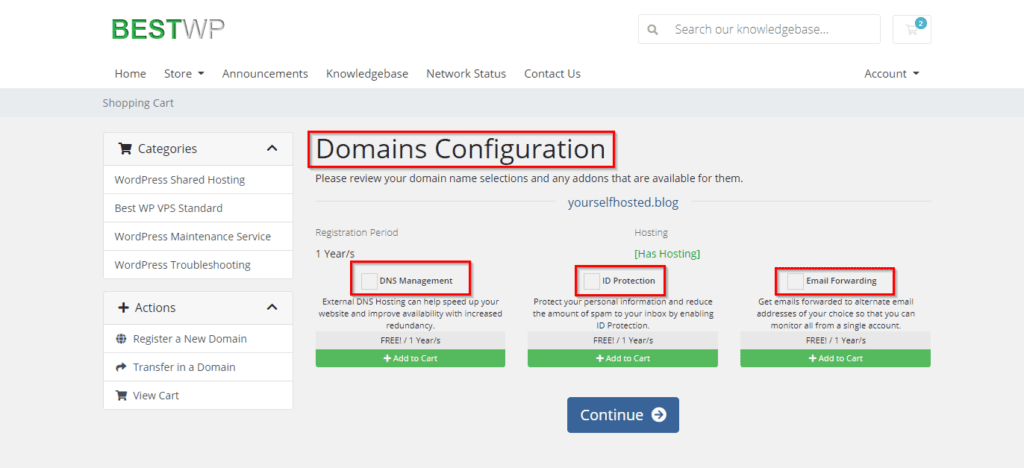
Please review your domain name selections and any addons that are available for them
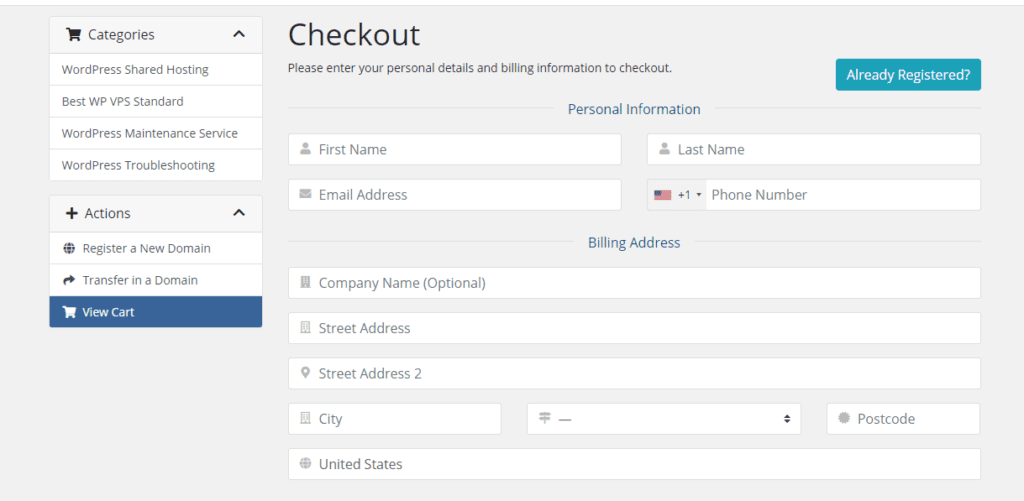
Review & Checkout
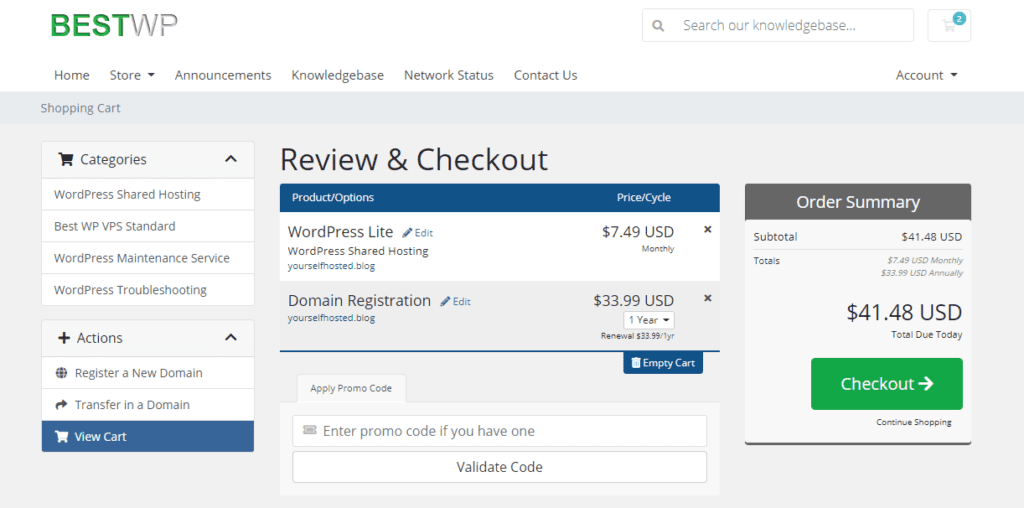
Please enter your personal details and billing information to checkout
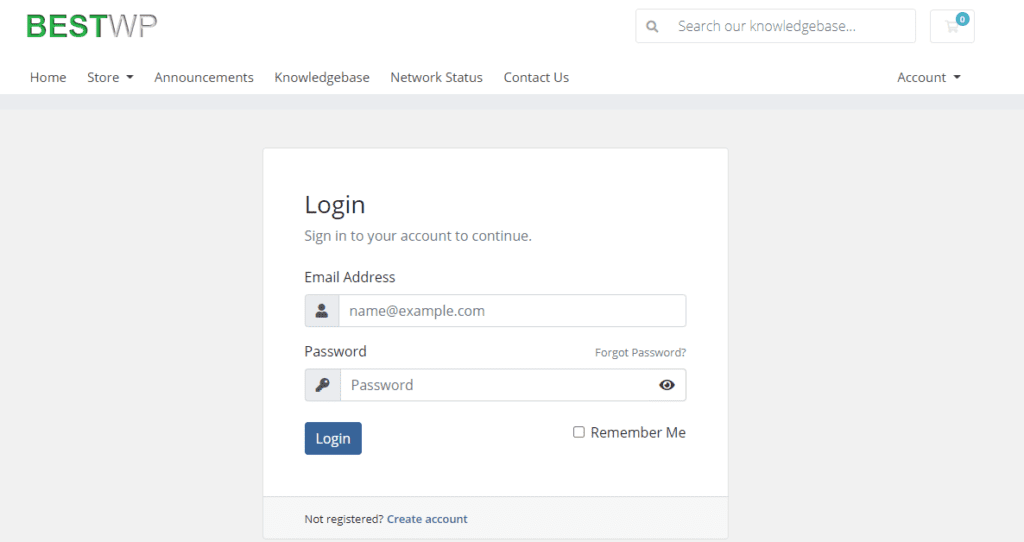
If already registered with us you can bypass all this by logging in
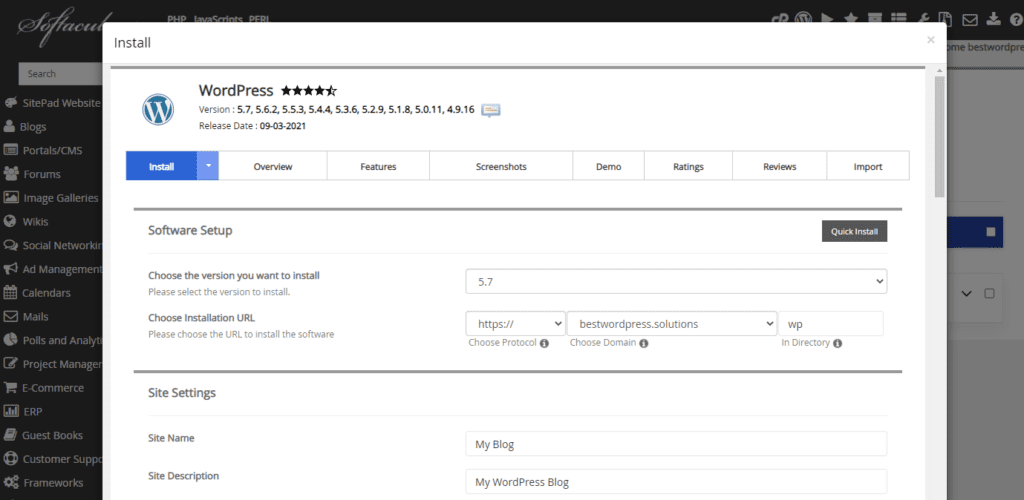
Install WordPress
Once you have signed up with Best WordPress Solutions you’re able to install your WordPress blog through our WordPress Manager.
Here’s what you do exactly to get to install WordPress on Best WordPress Solutions
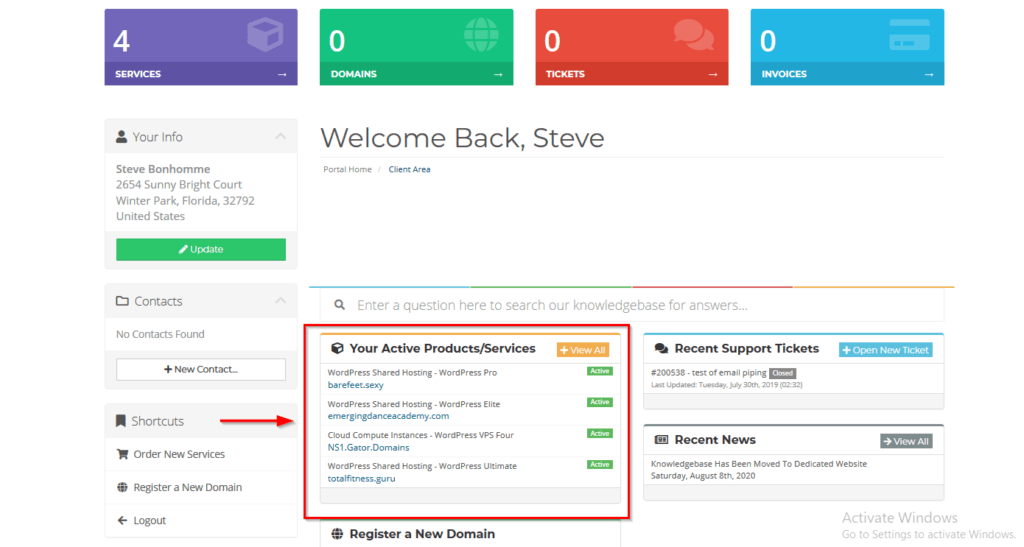
Login to Client Area
Select newly purchased shared hosting plan
Select Login to cPanel from left action pane
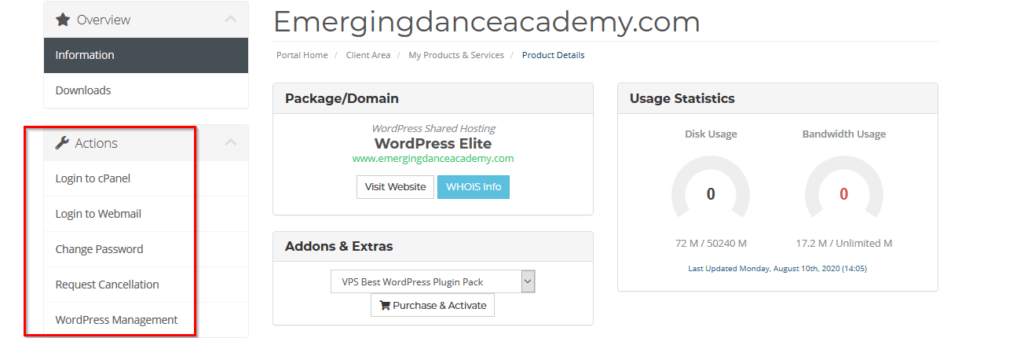
From cPanel select Softaculous WordPress Manager
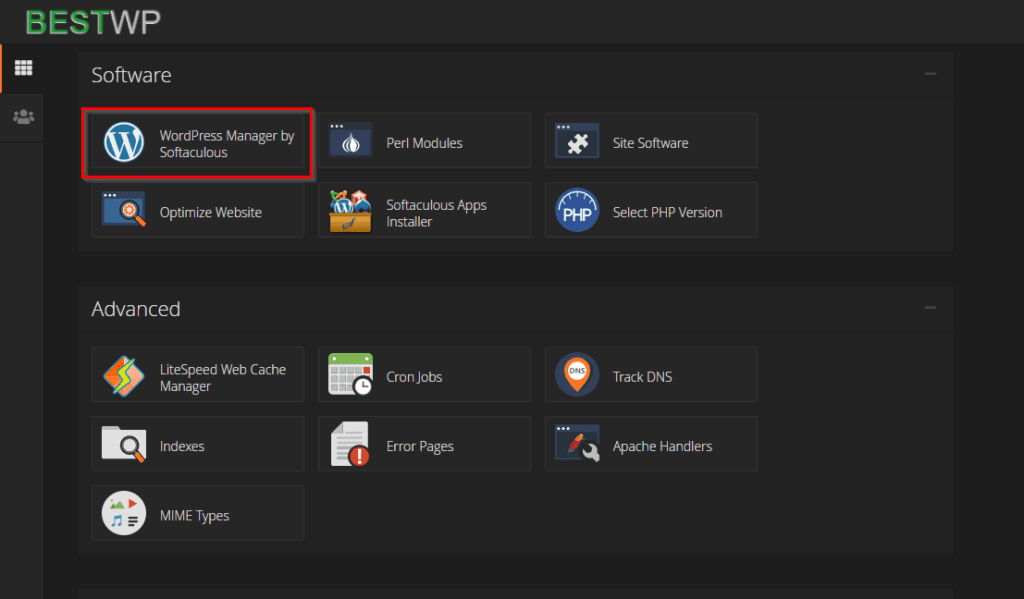
One Click Install WordPress
Fill out form. Questions are self explanatory. WordPress will install in a few seconds!
Step 4: Configure your new blog
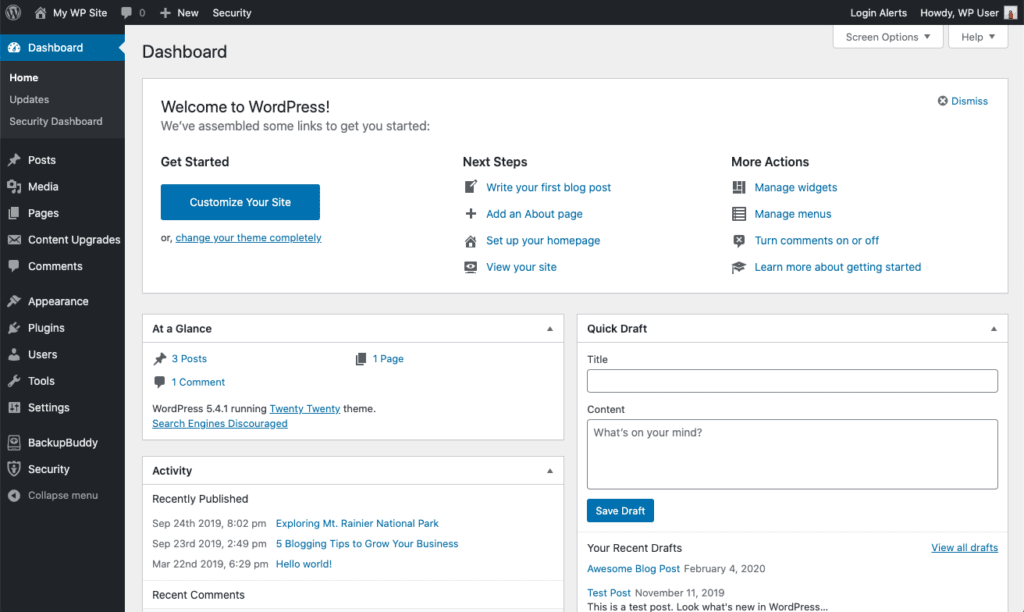
In the previous step you installed WordPress and set up credentials for your WordPress admin area. Now you can go to yourdomain.com/wp-admin and login with those credentials.
Upon logging in you will be redirected to your WordPress dashboard that looks like the picture below. WordPress is fully operational but now you need to customize it to make it your very own.
General Settings
Start by going to the left sidebar and clicking on Settings → General
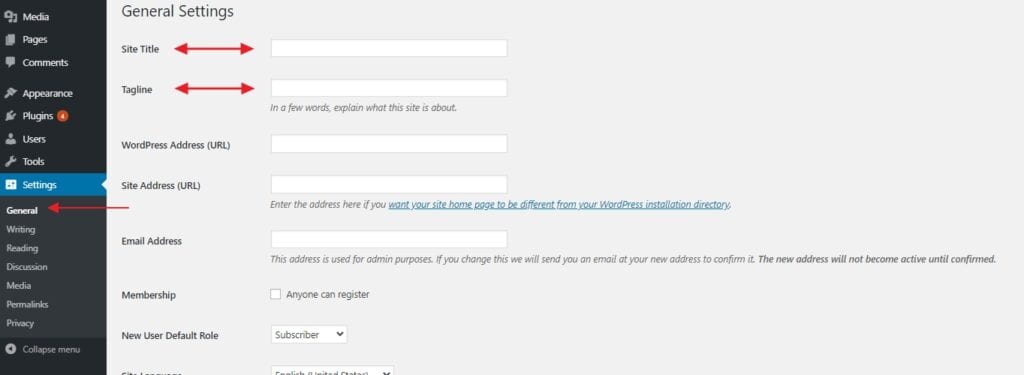
In the General Settings area you can set:
Site Title – The site title is effectively the name of your blog. Visitors see your site title first so its very important. It also plays a big part in search engine optimization. If this blog is for business purposes you may choose to use the name of your business as site title.
Tagline – The tagline should summarize what your blog is about in one short sentence. It can be your slogan.
In the General Settings area you can also set your time zone, preferred language and change your blog address(URL) if need be.
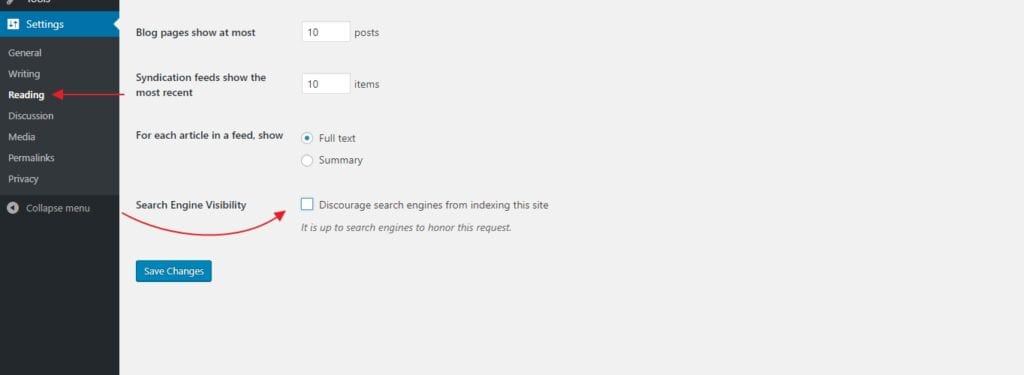
Make sure your blog gets indexed
Search engines will not index your site without permission. Its very important you choose to allow search engines to index your site if you want traffic from them.
To do that, go to Settings → Reading (again, from the main sidebar) and make sure that the field labeled “Discourage search engines from indexing this site” remains unchecked :
Permalinks
The permalinks settings define how WordPress will go about creating individual URLs – webpage addresses – for each of your individual blog posts or sub-pages. This is important for search engine optimization. This is advanced topic but to adjust the permalink setting is quite simple.
Just go to Settings → Permalinks. Once there, set your permalinks to the Post name option as illustrated below:
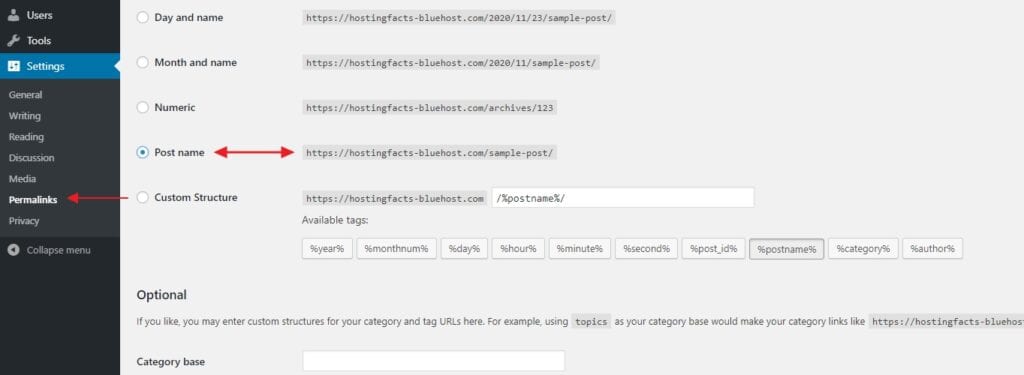
This is the best setting for search engine optimization and the most optimal.
Step 5: Choose a theme for your blog
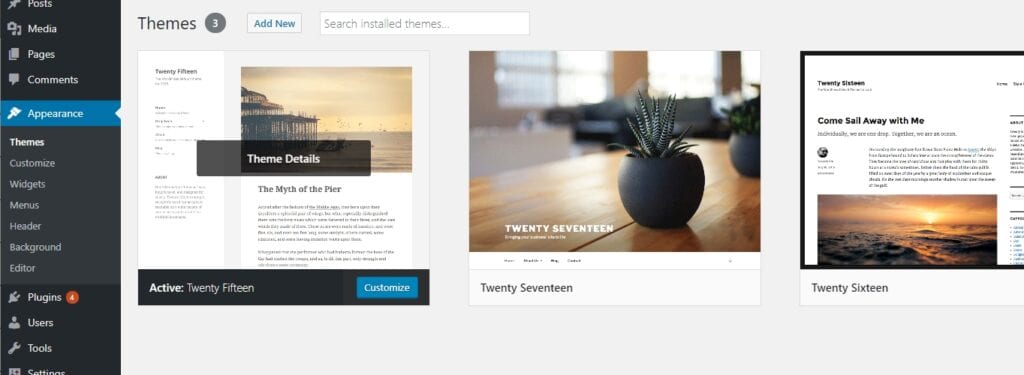
On of the best things about WordPress is the ease at which you can change the way your site looks even with no design experience or coding knowledge what so ever. This ability is thanks to the thousands of WordPress themes that are available on the internet. As a Best WordPress Solutions customer you also have access to hundreds of dollars worth of premium themes and don’t only have to rely on the free ones found on WordPress.org.
Go back to your WordPress dashboard and navigate to Appearance → Themes. Once there, click on Add New:
Then, switch the tab to Popular:
Popular themes are the best themes that are freely available on WordPress.org. These themes can be installed with one click.
Take your time and select the theme that best suits the purpose of your blog.
Once you do see a theme you like, you can install it to your blog by clicking on Install next to the theme’s name, followed by Activate.
Don’t be afraid to experiment, you can change themes as often as you want. The content on your site will not be over written, just appearance will change, styles, colors, fonts etc.
Step 6: Change colors, structure, and add a logo to your blog
The WordPress theme that you choose comes with predefined design but you can still change/customize it to suit your needs and liking.
This is all done if you go to Appearance → Customize. You will then see the WordPress Customizer:
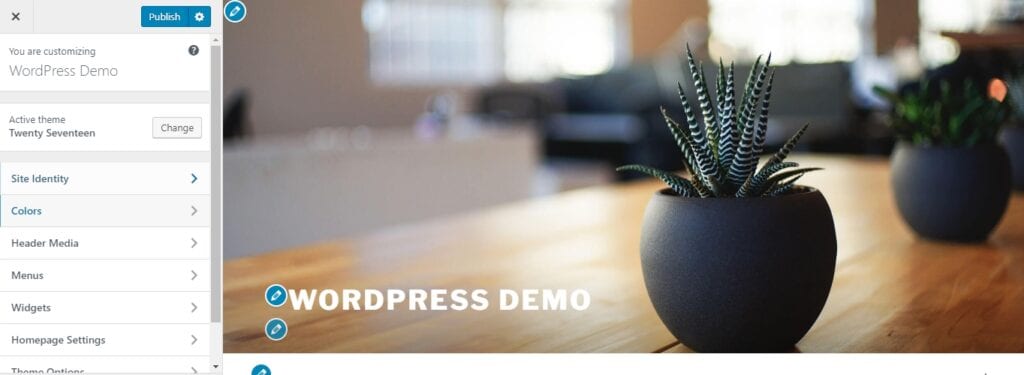
The options that are available in the Customizer will vary based on the current active theme but the most common options are:
- Site Identity– You can set the site icon aka favicon, add logo, and also have the ability to set site title here once more
- Colors– Ability to adjust basic site colors
- Header– Set header graphic or image
- Background– Background image, graphic or color settings
- Menus– We will go into details on this setting later in this guide
- Widgets– We will go into details on this setting later in this guide
Adding a favicon and logo
To add your logo, just click on the Select logo button. On the next screen, WordPress will let you know what sort of graphics are acceptable for logos.
In the live preview window you will see your logo after uploading it.
To add your favicon, click on the button labeled Select image under the “Site Icon” section. WordPress will let you know what file types are acceptable for favicon just like it did for logo setting. There is no live preview option when favicon has been uploaded though, look at the main top bar of your web browser to see it.
Change your blog colors
Depending on the theme you’re using, you will see a different set of options in this section of Customizer. Even with a theme that doesn’t offer that many settings in this area you can still use it to make your design unique and showcase your brand/business.
Add custom graphic to header
These settings are also dependent alot on the theme that you are using but you should have the option to add an image or even a video to the header. Just click on Add new image to set header image/video.
You can pick whatever image you want. WordPress will let you know image requirements in the upload screen. Be sure to pick image again that is Intune with your brand and has sufficient quality.
Change blog background
Some themes come with the ability to set the main background for your whole website. You can change the background to an image or pick solid a color. If you experiment long enough with this setting you can create some pretty interesting and unique effects.
Step 7: Add new blog posts/pages
You are now at the fun part of this guide, creating your blog posts, most of the hard work is behind you.
You will most likely need most of the following pages for your blog build:
- Blog– You can create this dedicated page for your blog posts or you have the option of having WordPress use home page for blog archive
- About– You can use this page to tell visitors who you are, about your business if any and what this site is for
- Contact– You can let visitors know how to get a hold of you on this page. I have a contact form on my contact page, its up to you what forms of contact you want to use
- Services/Products– If you are using your blog for sales you can use a dedicated page for that purpose or use a plugin like WooCommerce to add a online store to your blog
- Testimonials– Depending on the nature of your blog you can use this dedicated page to have past customers tell others about their experience on your blog
- Portfolio– Showcase of your work, this depends again on what your blog is about. For example, photographers typically have portfolio pages
Create new pages
No matter what type of page you want to create in WordPress the process is the same. You may want to put your site in maintenance mode or leave the page in draft status to prevent others from seeing it before its finished.
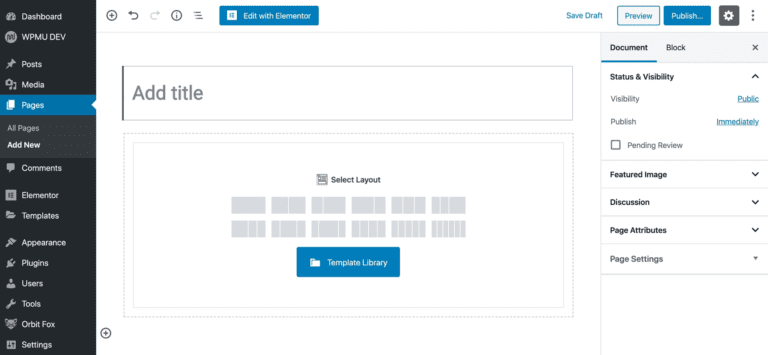
To create a new page go to your WordPress dashboard and then to Pages → Add New. What you’ll see is the main page editing screen of WordPress:
Type in a title and use the editor to create your page. Once you are done with your page and you’re ready to share it with the world simply hit the Publish button.
Create new blog Posts
WordPress has a separate section that allows you to create and publish blog posts, that’s how important creating posts is in WordPress.
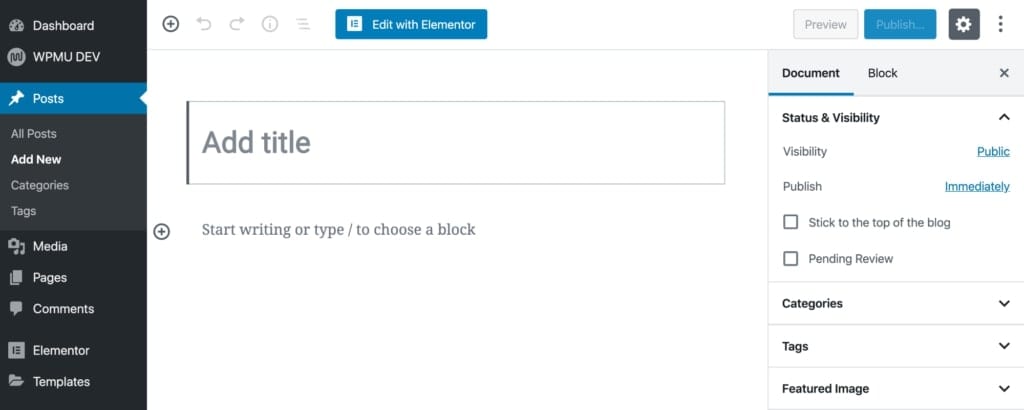
You can find it if you go to Posts from the main WordPress dashboard sidebar:
The only difference in the process of creating posts versus pages is that the blog post will either appear on your home page or dedicated blog page you choose in settings. Pages on the other hand have to be added to your navigation menu for your site visitors to find them.
In WordPress menus allow your visitors to find your pages and navigate through your site. There should be one main menu that is located in the site’s main navigation bar. Visitors that come to your site will expect to see this.
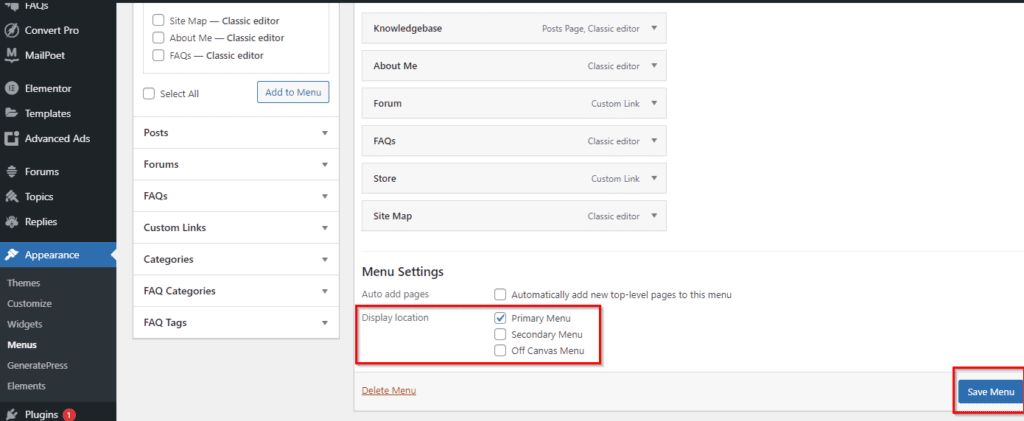
To create a new menu, go to Appearance → Menus. Once there, look through the list of the available pages (the pages you’ve created so far) and click the checkboxes next to the ones that you want to have in your new menu. Then, click on Add to Menu. You’ll see your pages listed in the section on the right.
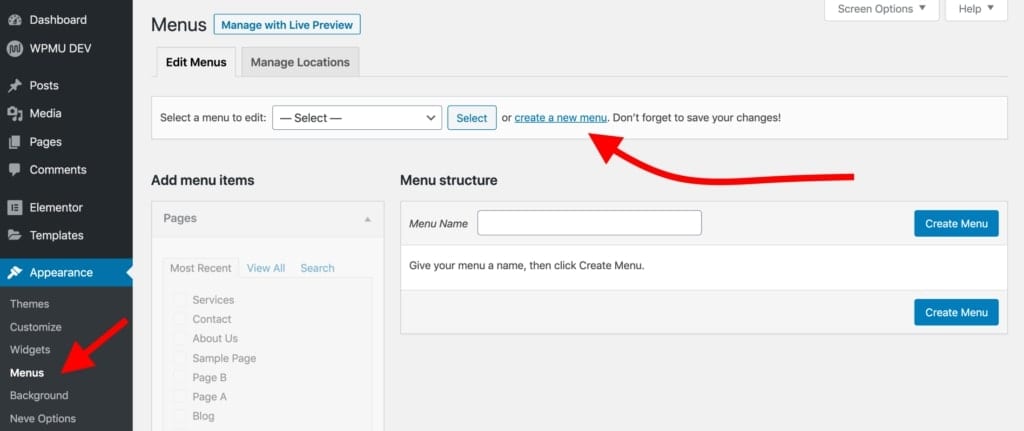
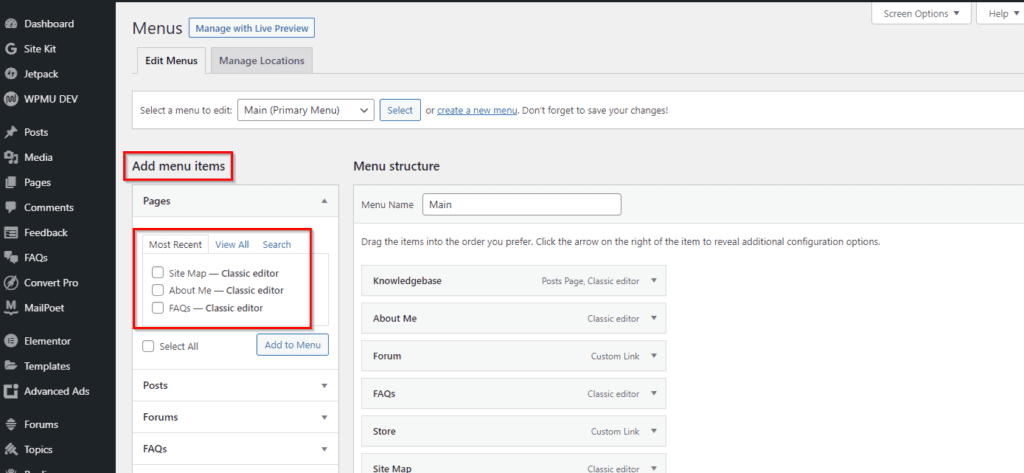
At this stage, you can also drag-and-drop those pages to realign them. When you’re done, you can also select one of the checkboxes under Display location (see below). Most commonly, your main navigation location should be listed there. When we click on the main Save Menu button, the menu is going to be set.
Depending on the theme you are using you may have no sidebar or a number of sidebars available. You may also have a customizable footer.
Widgets are small blocks of content that can be displayed in various places throughout a WordPress blog. We are going to use widgets to control with is displayed in the footer and sidebars.
To see the widgets that are available go to Appearance → Widgets.
Here is a list of the most common widgets you will have at your disposal:
- Archives – a list of all your past blog posts
- Image – an image of your choice
- Categories – a list of all your blog categories
- Recent Posts
- Search – a search bar
- Text – a piece of custom text
You can put these widgets wherever you want but most commonly they are used inside the footer and sidebars. For example, we can drag-and-drop the Recent Posts widget to the Footer 1 widget area. Depending on the theme you are using the widget areas you have available in the admin panel may vary.
Launch your blog
After going through the steps in this guide your blog is ready for launch. Remember these are just baby steps. there is alot that goes into running a successful blog. After launching your blog you must strive to not only maintain it but you must put effort into improving it. With our help and other guides we have on Best WordPress Solutions you have a better chance! Please visit our knowledgebase for more guides and useful tips.
This is a great article on starting your own self hosted blog. If you need help starting a ecommerce site check out this nice article on ecommerce setup. Need hosting advice? Check out this article on best WordPress hosting. What is the point of you going though all the work of setting up your blog if it falls prey to hackers or malware. Our article on WordPress security vulnerabilities and WordPress complete security guide will help mitigate that. Interested in search engine optimization, check out our short informative article on Google Core Web Vitals.