
Last Updated on December 28, 2022 by Steve
We all use URLs as we type them in our web browser but we never take the time to think of what makes a a high quality pretty WordPress permalink. By the way, instead of saying URLs in WordPress we use the word permalink.
You will have to spend time on your WordPress permalinks to get the most traffic from search engines to your site. Permalinks have a big impact on SEO and how high search engines rank your site when people search for terms relevant to your site. Most people don’t pay that much attention to their permalink structure but it is as important as any other design consideration in WordPress.
One thing I must note right now is once you settle on a permalink structure be careful changing it since this can break your site. Take your time to pick your permalink structure because changing it further down the road when you have plenty of posts and visitors now becomes a bigger undertaking.
We will talk about everything you need to know about WordPress permalinks in this tutorial including important aspects like basic structure and how to make them. For the readers who already had a permalink structure in place but want to change it I will also teach you how to safely change your permalink structure without breaking your site and end up with white screen or 404 errors.
What is a WordPress Permalink?
A permalink (permanent hyperlink) is simply a fancy name visitors use to access different content on a WordPress site.
Structure of WordPress Permalink
Permalink has two parts
- Website’s domain name ( For example yourblog.com)
- The slug. This portion describes the content on the page (For example /about-us)
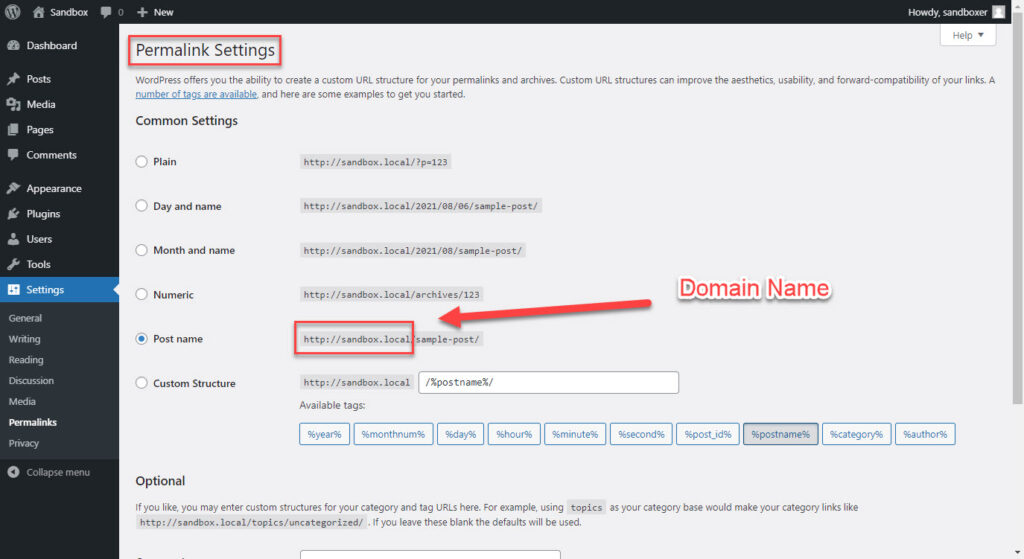
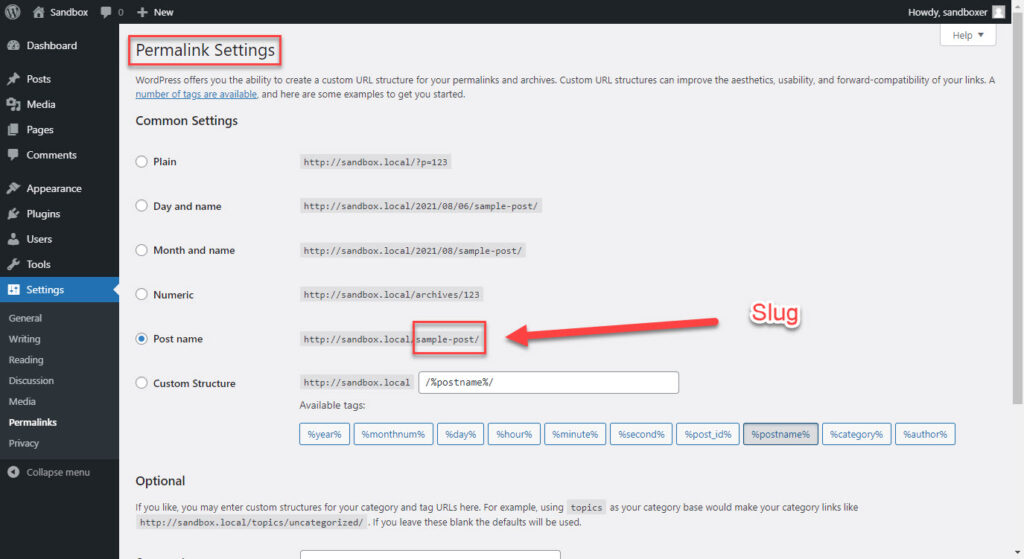
A full permalink in the example above would be http://sandbox.local/sample-post.
Why Are Pretty Permalinks Important?
There are many reasons why pretty permalinks are important. Of the top of my head a few good reasons are navigation, organization, user perception and impact on search engine optimization. I will elaborate on each.
Permalinks lets users know where your content resides on the web. By using permalinks your users can book mark your content to return to it at a later date or share content with other users.
The permalink is a unique entity meaning that it can help identify, and organize your content. By looking at your permalink users should have a pretty good idea of how your site is organized and where they would have to go to find other content on your site.
User Perception
Users look at your URL when they are considering if the content is of interest to them or not. Depending on how well structured your permalink is can have an impact on whether the visitor stays on your site or leaves immediately. Some users may not even click on the link based on the URL. When users scroll through search engine results they tend to only pay attention to the title and URL of the websites returned that grab their attention. At this point they tend to only click on the link that interests them, a well structured, to the point, and optimized permalink.
Impact on Search Engine Optimization
The website’s URL is a small factor when search engines rank results but it is a factor to consider nonetheless. The authority of the domain matters as well as the keywords used in the URL. Careful selection of keywords used in your URL can boost your SEO rankings and drive traffic to your site.
How to Change Your Permalink Structure
Instead of just using the date and title of your post you may consider including a tag and a category, especially if the category or tag have keywords relevant to your site.
WordPress creates permalinks using the following structure by default:
Your Domain Name + Year When the Post was Published + Month When the Post was Published + Title of the Post
Its extremely easy to change your permalink structure from the default at the time you are creating your site.
You can change the permalink structure of your pages via the WordPress Dashboard by going to Settings > Permalinks. WordPress provides you with several options, which are shown below:
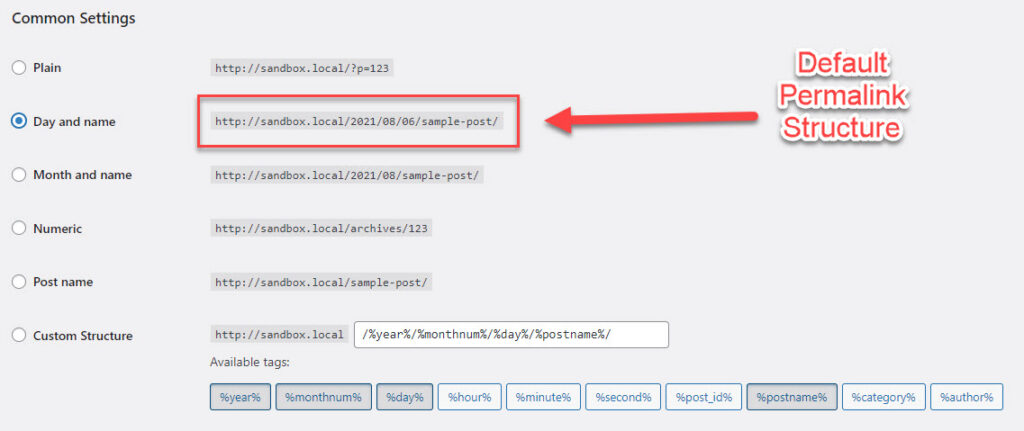
The default permalink structure makes your URL too long and includes information that your readers may not be interested in like the date of the post. To make your permalink prettier and SEO optimized you should consider shortening it to include only post name.
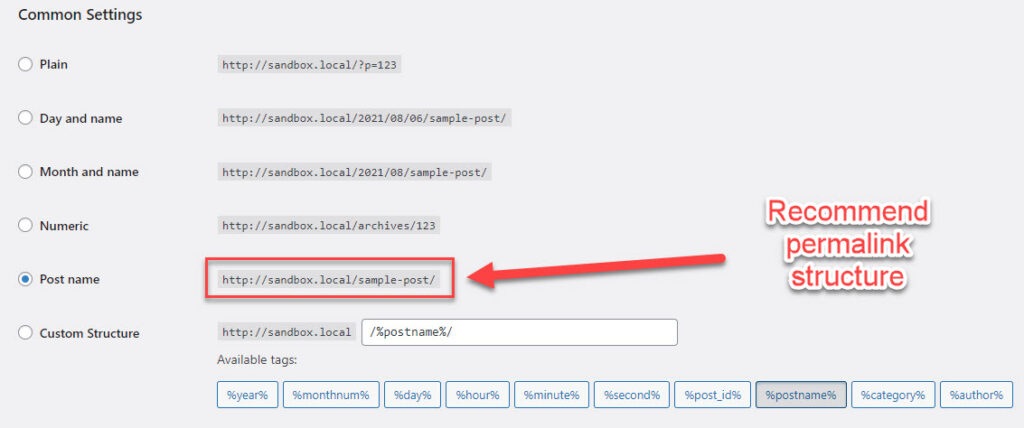
If the default WordPress permalink structure or the structure that I recommend does not work for you the option of custom permalink structure is available.
WordPress offers placeholders for the following pieces of information:
- Year
- Month
- Date
- Hour
- Minute
- Second
- Post ID
- Post Name
- Category
- Author

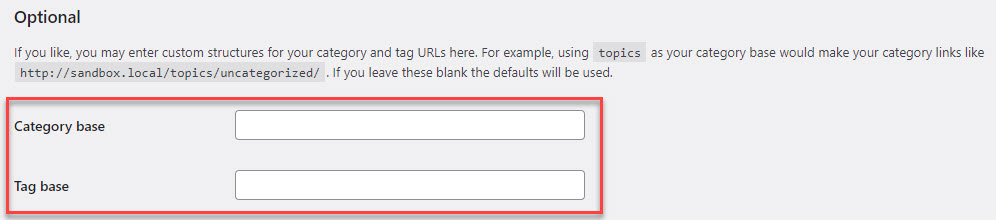
You also have the option of changing your base URL to include a predetermined value for your categories and tags. For example, if your permalink is like this:
http://your-domain.com/your-category-base/your-tag
You can change your-category-base and your-tag by using the Category base and Tag base fields.
By setting your category and tag bases, you can embed keywords in your permalinks without manually changing each post as you create them.
How to Change Permalink Structure Without Breaking Your Site
In the previous sections we discussed how to customize your permalink structure when you first setup your WordPress site. Things are not that simple when you already have a bunch of content and you need to change your permalink structure. The question now becomes what do you do with those permalinks?
How to change your permalinks in WordPress without breaking links is challenging, especially to a beginner. Next we will talk about what happens when you change your permalinks as well as how to make those changes safely and preserve your site’s links.
Why You May Need to Change Your Permalinks
Lets start by talking about the downside of resetting your current WordPress permalink structure.
Changing your permalinks can negatively impact your search engine rankings, break any existing links external sites might be using to drive traffic to your site (backlinks), and break existing links you may be using on your website that lead visitors to that page. The good news is all these problems can be mitigated and I will show you how.
Now lets talk about the upsides of resetting your current WordPress permalink structure.
- Your current posts use a permalink structure that is not user friendly. For example your current structure uses Post IDs/numbers. URLs with Post IDs or numbers are not easy for people to remember and cant be used for easy reference at a later date.
- Your current permalink structure offers no search engine optimization advantages.
- You are rebranding your site and want your permalink structure to reflect your new branding.
Change Permalink Structure For Entire Site in 3 Steps
- Back your site up
- Change permalinks
- Set up redirects
Now we will go over each step in further detail.
Step One: Back Up your WordPress Website
Backing up your website is the first thing you should do before making any major changes. Create your back up and store it safely then go to next step.
Step Two: Change Permalinks
You can update your permalink structure using your WordPress dashboard if you want to update the permalink structure of your entire site. We discussed this in a previous section of this tutorial but I would like to recap that this action does two things:
- Changes permalink structure used for existing pages and posts
- All future content you make will be saved with updated permalink structure
Step Three: Set Up Redirections
If you don’t set up redirections your users will get 404 errors after changing permalinks.
This is because all references regardless of whether it is on your site or someone else’s site is now incorrect and all links are broken. Search engine index of your site are using old URLs and are broken as well. Anyone using one of your old links will now get 404 error message saying page not found.
You will need to set up redirections to prevent this from happening. HTTP 301 redirects are the ones we will be setting up indicating that these redirects are permanent.
There are two ways to set up redirection. You can manually add these redirects to your WordPress site’s .htaccess file. The format for each redirection is as follows:
Redirect 301 /your-former-post-url.html /your-new-post-url.html
You can use a plugin to set up the redirects, and that’s the option I recommend. Its easier, especially for beginners to WordPress. We will discuss recommended plugins you can use later in this tutorial.
Change Permalink Structure on Individual Posts
You can change permalinks in WordPress on individual posts. This is a simple process. To do this change simply:
- Open the post or page you want to change permalink
- Edit permalink
- Save post or page
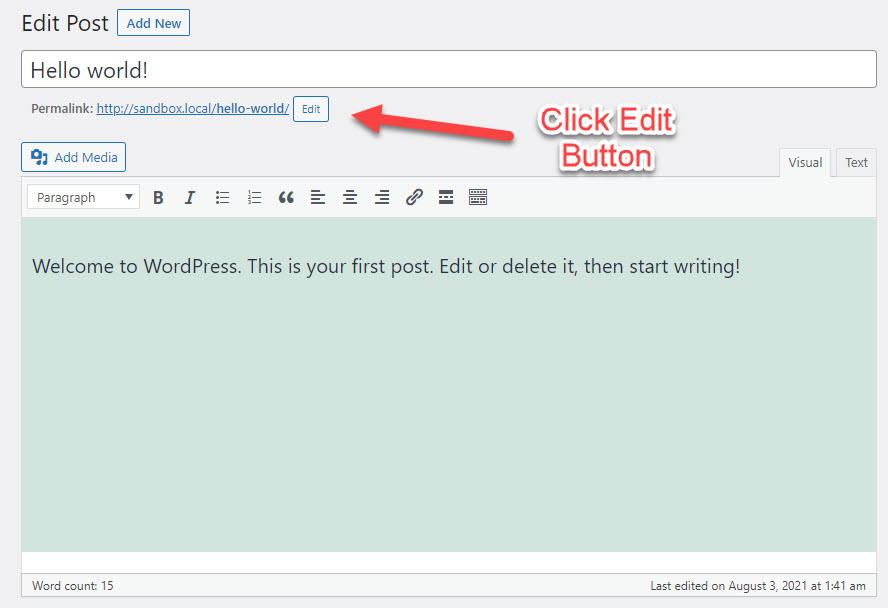
In Classic Editor click on edit button to change permalink.
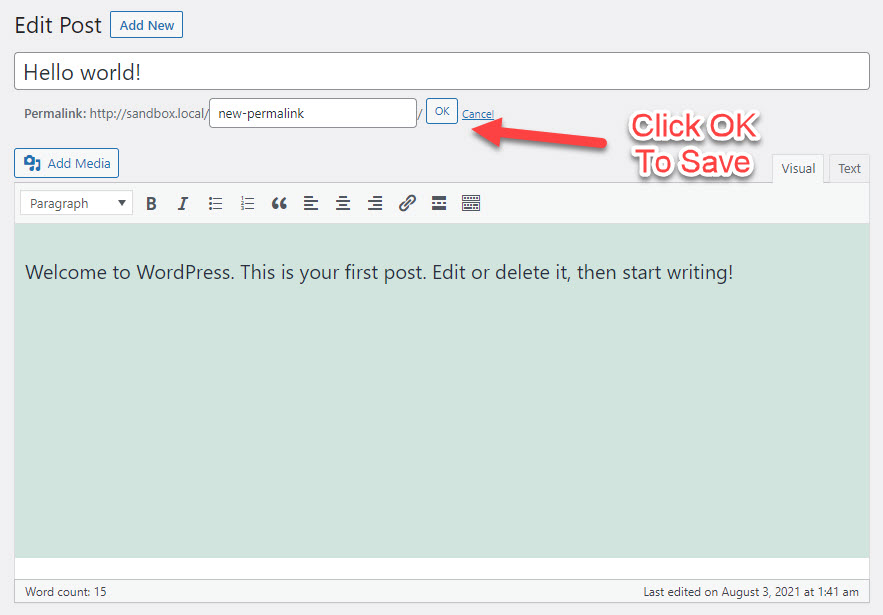 Click OK to Save Changes in Classic Editor
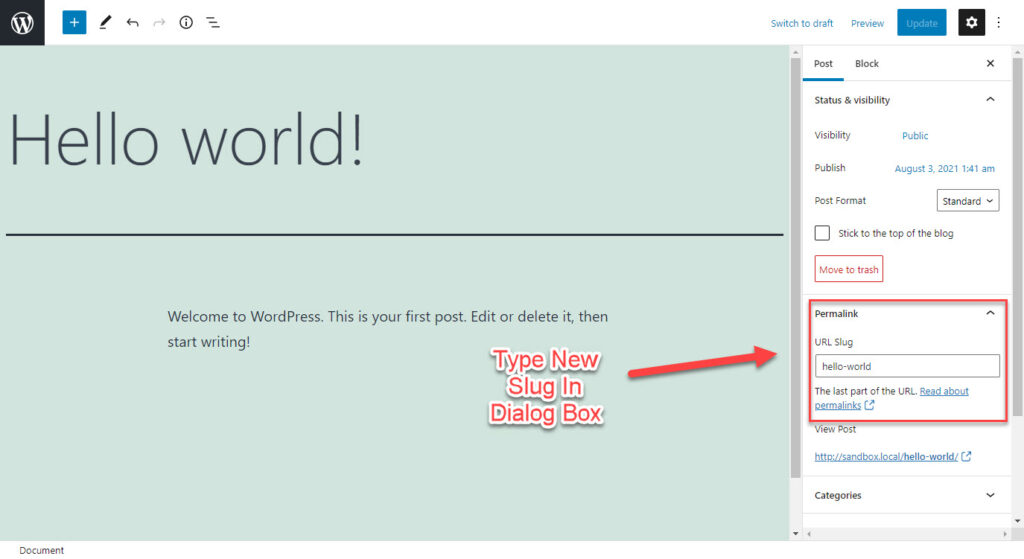
Its just as easy to make changes in Gutenberg Editor.
You will have to set up redirection for your post after changing the permalink. You can manually add redirection to the .htaccess file or use a plugin instead.
Change Permalinks Using a Plugin
There are many plugins you can use to change permalinks in WordPress. Some of these plugins give you alot more flexibility and freedom when it comes to changing your permalinks in comparison to the basic features offered by WordPress. Some of these permalink plugins automate the process of changing your permalinks by setting up redirection whenever you update a post, some are even powerful enough to also check for broken links. By informing you of broken links your users never have to see one, a big plus in my opinion.
Permalink Manager Pro helps users control permalinks for posts, pages and custom post types. It also helps users to create redirections for the post or pages that URLs have changed. You have the ability to set up 301 or 302 redirects and a bulk editor to change permalinks on a massive level. I really like this plugin and use it on my sites.
Permalink Manager Pro is a paid plugin. You an go to their site for latest prices. If you are on a budget and do not need their advance features they do have a Permalink Manager Lite version which is free to download but with reduced functionality.
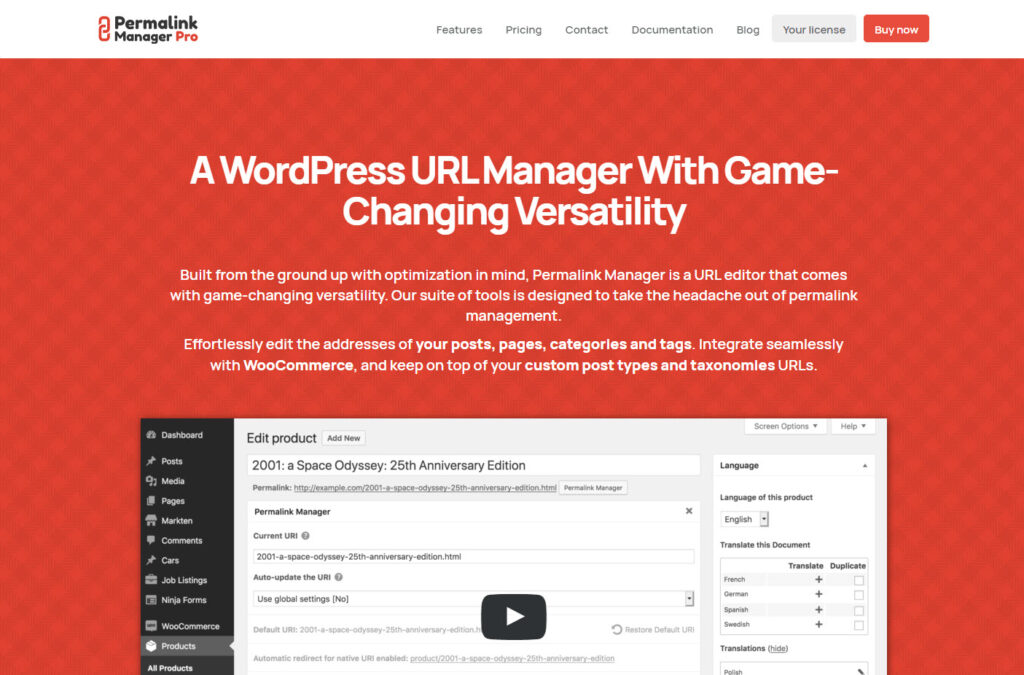
Permalink Manager Pro plays well with other plugins like WooCommerce, and Yoast SEO.
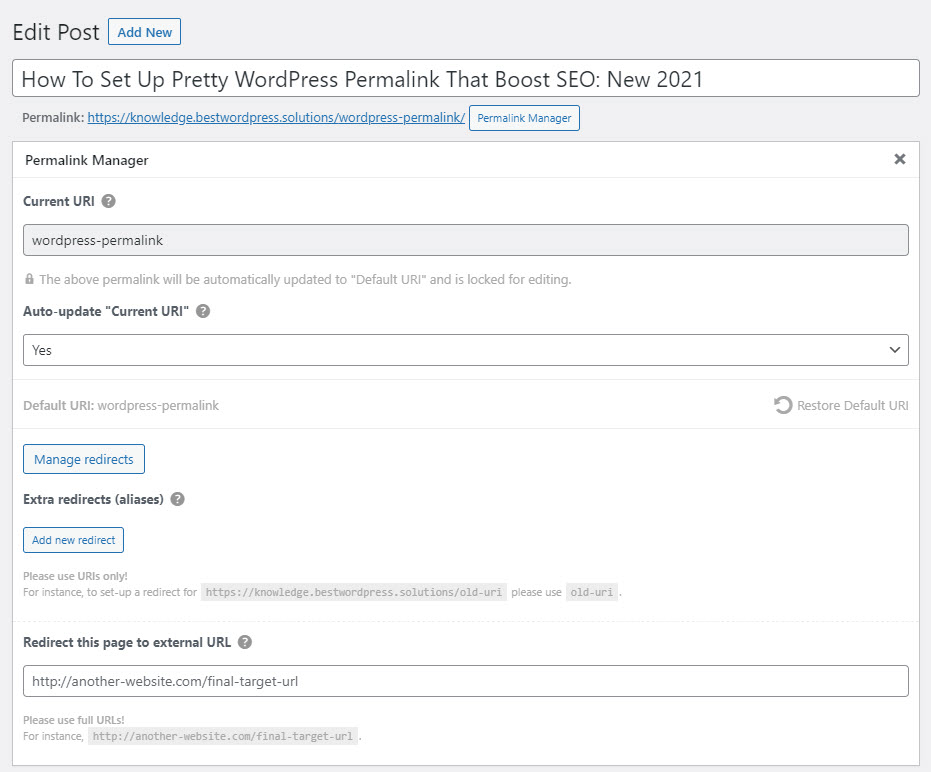
This awesome plugin allows you to:
- Set a fully customized URL for posts, pages, tags, or categories
- Set up redirects from the old permalinks to the new permalinks
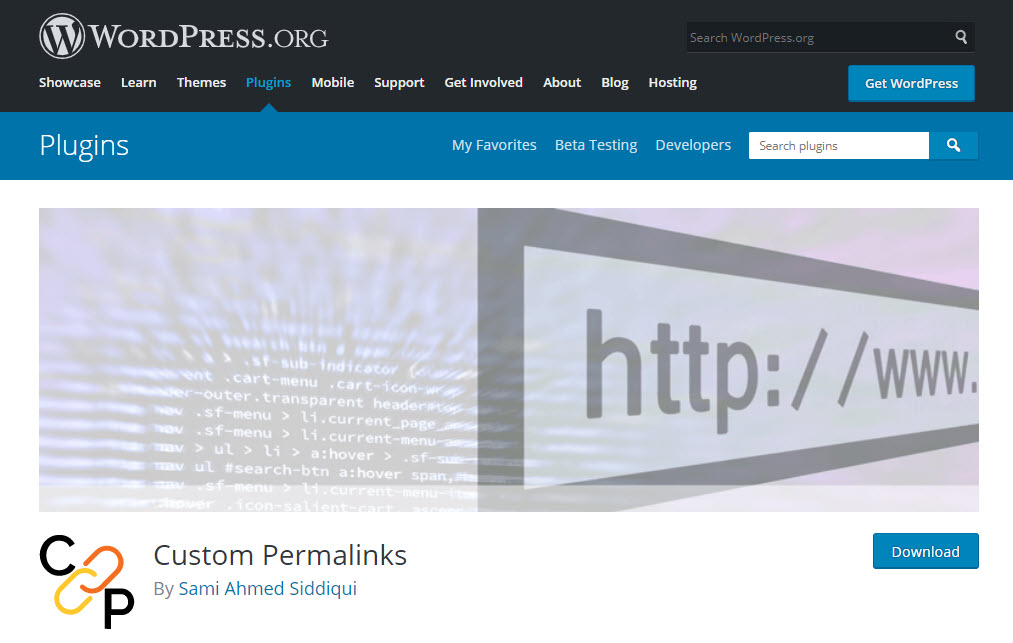
This plugin is limited to only work with individual post, page, tag or category, not mass changes however. It is free though and can be downloaded from WordPress repository.
How to Fix SEO Related Issues Due to Changing Permalinks
We briefly mentioned earlier in this tutorial that changing your permalinks leads to breaking all existing links. By setting up HTTP 301 redirects we can alleviate those issues.
We also need to update search engine indexes with the new permalinks. This will allow you to update your rankings based on your new URL keywords and also minimize the amount of redirects that need to happen which will speed up page load times for all visitors.
Search engines use XML sitemaps to figure out how your website is structured. XML sitemaps list all of your posts and pages and can indicate how frequently a specific page is updated and when it was last updated.
Generate Sitemaps Using Plugins
To assist search engines in updating their indexes of your site you can use a plugin that can help you generate sitemap. Some of these plugins are so sophisticated and can automatically let search engines know when you have made changes to your site and it needs to be re-indexed.
SEOPress
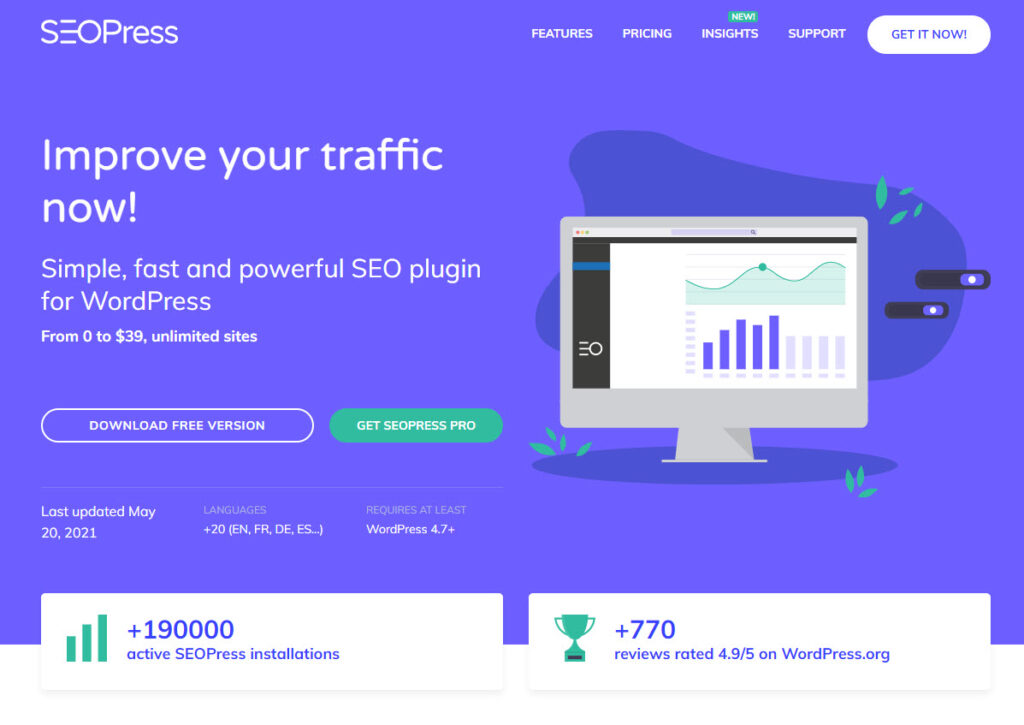
SEOPress is a powerful SEO plugin for WordPress that is an amazing tool for optimizing websites for search engines. You can easily use it to generate a sitemap for your WordPress site.
It also has other powerful SEO features like Open Graph, meta info, .htaccess editing, 404 monitoring etc. This plugin has free and paid pro version.
XML Sitemaps
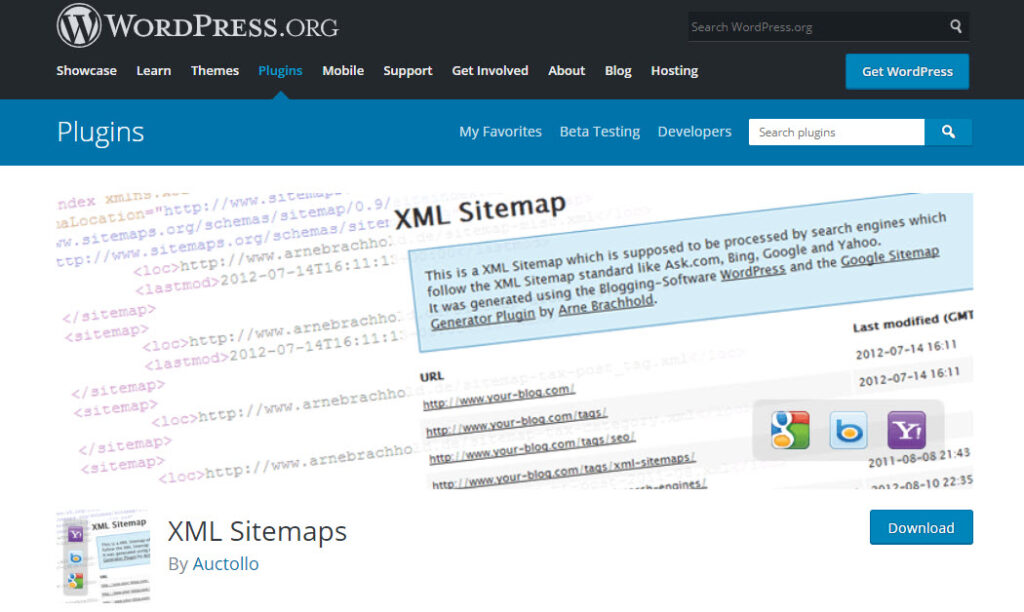
XML Sitemaps lets you easily create XML sitemaps of your WordPress site. This plugin notifies the major search engines every time you make a change by posting new content. This plugin can be freely downloaded from WordPress repository.
Simple Sitemap
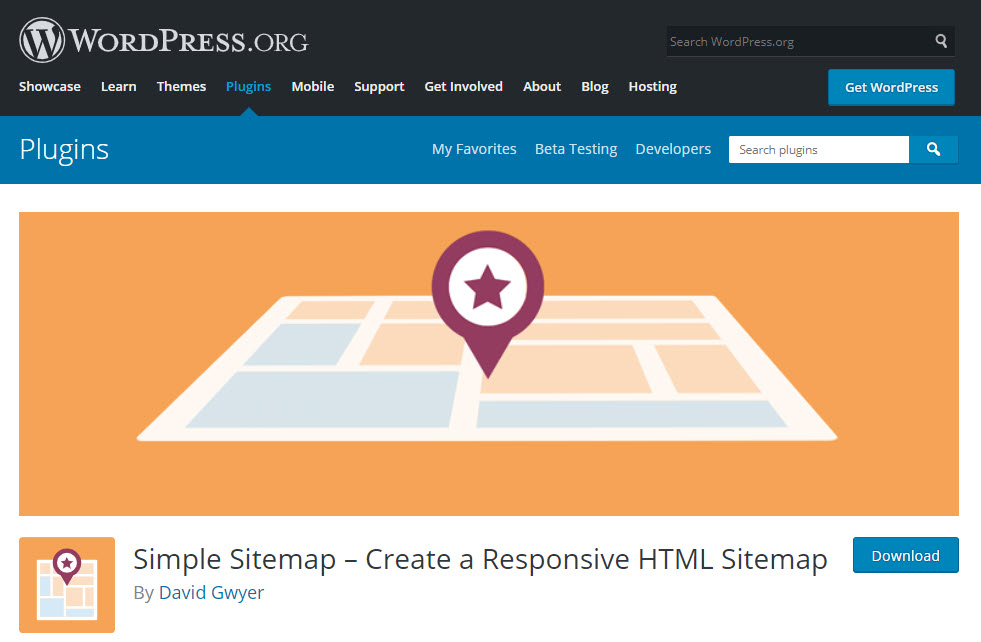
Simple Sitemap allows you to build and preview an HTML based sitemap in the WordPress post editor. This plugin will automatically generate HTML sitemap for you out of the box without you having any coding knowledge or need to do any setup. This plugin can be downloaded for free from WordPress repository or for complete feature set a pro version is available.
Manually Re-indexing Your Site
Sitemaps provide search engines with the information they need to index your website properly. If your website has already been indexed you can request manual re-indexing without the use of a plugin.
Plugins You Can Use To Manage Redirects
As previously mentioned in this tutorial you have to set up redirection every time you change a WordPress permalink, if not your visitors will see a 404 Page Not Found error and they will not be able to view your content.
To set up redirection so your users can find your content at its new address you have two options:
- Manually adding the redirect to the WordPress permalinks .htaccess file
- Using a plugin to automate the addition of redirects to the .htaccess file
I recommend using a plugin since this task can be tedious. Using a plugin also reduces the chance of errors occurring. Some plugins update the .htaccess file to set up the redirections while others use different means. Either way the job gets done and you get to keep your users and the search engines happy navigating your site.
Here is a list of the plugins I recommend you use.
301 Redirects – Easy Redirect Manager
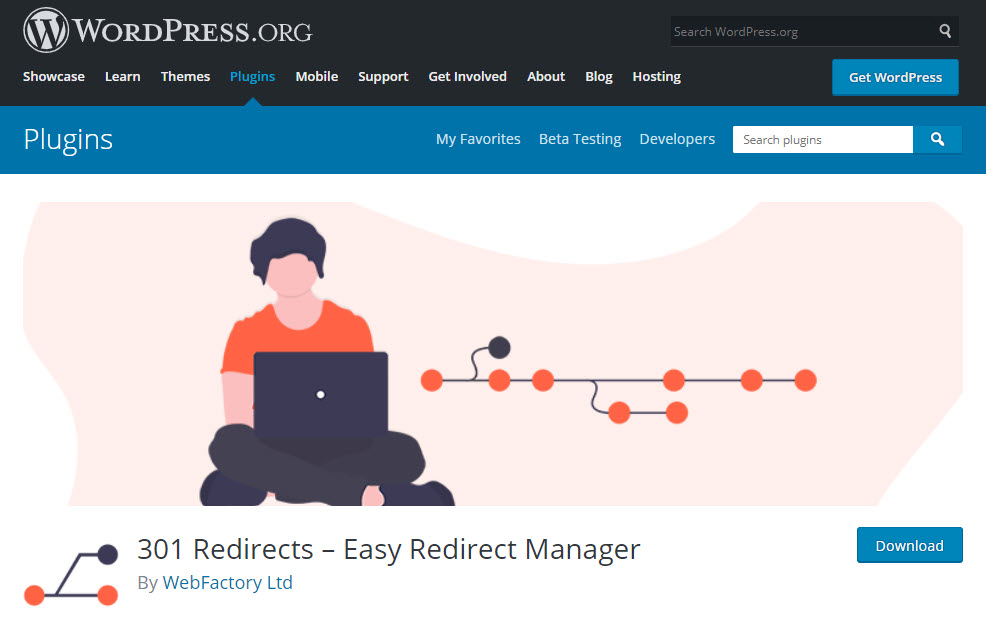
With 301 Redirects you can easily set up 301 and 302 redirects. 301 redirects indicate permanent page move while a 302 indicates a temporary change. 301 redirects is the one you need to setup after changing permalinks because this change is obviously permanent. This plugin is easy to use and you can use it on a new site or an existing one for repairing links. This plugin is currently free.
Redirection
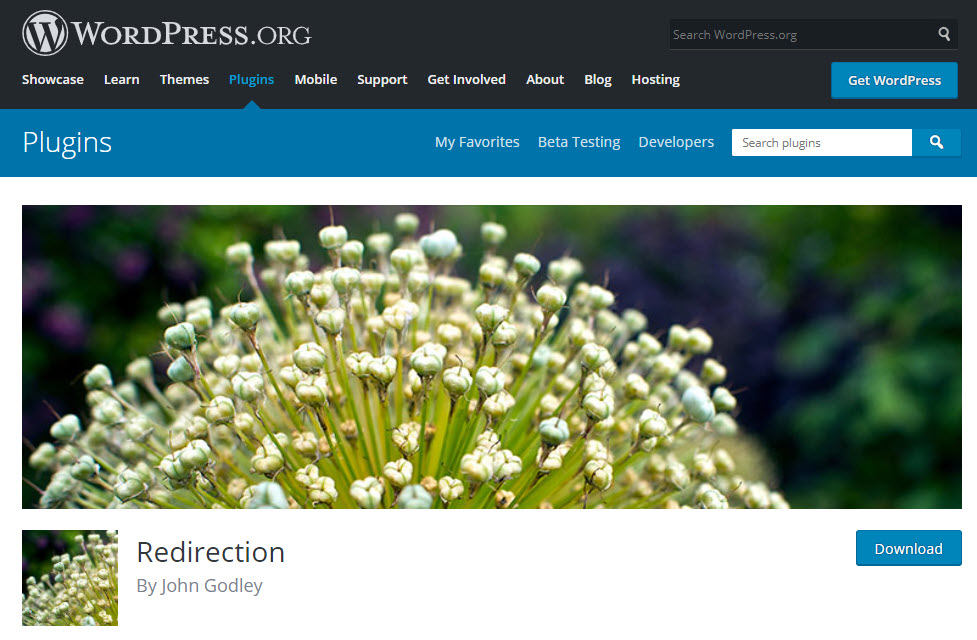
Redirection is a really good plugin and is currently is use in over 1 million WordPress sites. Redirection allows you to manage your 301 redirects and track any 404 errors you might see so that you can improve both your users’ experience with your site and your search engine rankings.
Redirection automatically sets up a redirect for you every time you change a post’s URL and it does it without the use of the .htaccess file.
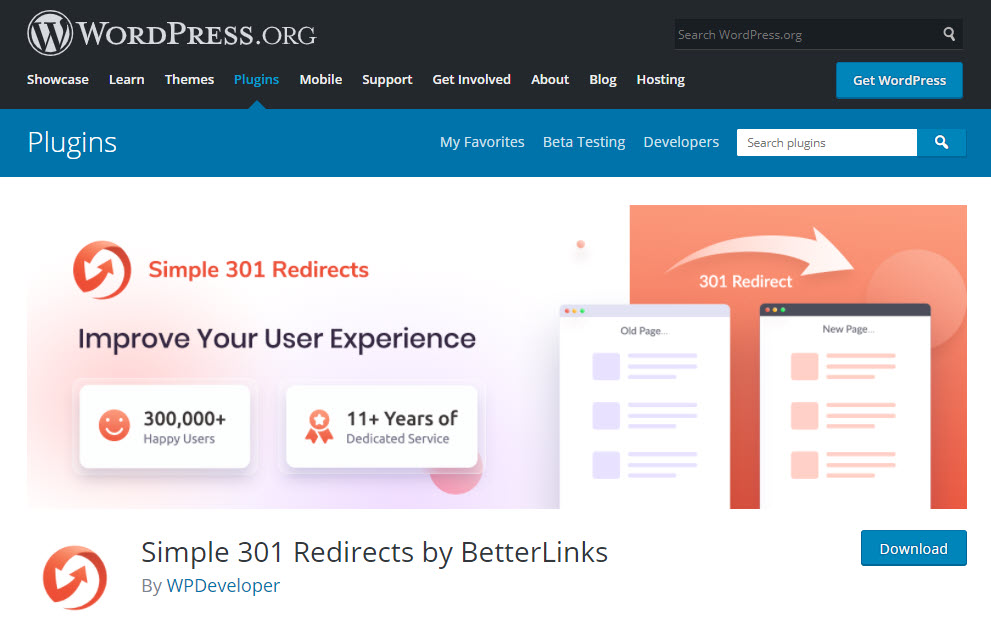
Simple 301 Redirects
Simple 301 Redirects offers an easy way of creating redirects from one page to another. However you have to manually set up redirects by providing source URL and destination URL. The plugin tries to make the process easier by not requiring you to work from the .htaccess file.
Troubleshoot Issues Regarding WordPress Permalinks
If your permalinks aren’t working after making changes there are several steps you can take to try and fix the problem. The 404 Page Not Found error message is the most common seen issue after changing permalinks thus we will focus on that.
First, go to Settings > Permalinks. Scroll to the bottom of the page and click Save Changes. This action will update your permalink settings and force WordPress to flush its rewrite rules. There is a possibility that while you were making all these changes to your permalinks the configuration of your server got out of sync, you are attempting to correct this by flushing your rewrite rules.
If the problem persists then you will need to review your .htacccess file. First thing, did you add the redirects? If you have not then you will need to now by doing it manually or using a plugin like we discussed earlier. If you need assistance fixing the 404 error or help changing permalinks you may contact us by filling out this form or you can open up a support ticket.
Errors When You Haven’t Changed Permalinks
If you are unable to browse your website or you are seeing errors when you haven’t made any changes to your permalink structure, here are some troubleshooting tips you can try.
If you are unable to browse your site’s content as a whole, check the status of the web server that’s hosting your WordPress installation. Check to see if there is an outage that is affecting your site. Most webhosts have status updates posted online. Make sure to try to access more than one page, if more than one page is inaccessible then this would indicate a server wide issue.
If you confirm that your web server is not to blame then check any plugin or theme that you have updated or installed recently. If you think that a recently installed or recently updated theme is causing the problem then disable all but a default WordPress theme from the WordPress repository. If that doesn’t fix the problem then disable all WordPress plugins as well. At this point the site should be accessible if a theme or plugin is the cause of the issue.
Finally, activate themes and plugins one at a time until you see the page load issue returns. By doing this you can isolate which theme or plugin is causing the problem. Now you can seek guidance from the developer of the them or plugin to fix this issue or you can remove that theme or plugin and find a suitable replacement. The theme or plugin itself may not be the cause of the issue in itself, the issue may be that theme or plugin conflicting with another theme or plugin.
You must also keep in mind that updates to the WordPress core can also cause permalink issues, especially if a plugin that attempts to handle permalinks on your behalf conflicts with a WordPress update from Automattic.
If you recall the first step before making permalink changes was to backup your site. If all else fails and you cant get your site back online you can restore your site from this backup. This should however be a last resort. You also have the option of contacting us or purchasing a trouble shooting package from us and we will be more than happy to help get your site back online.
Errors After Moving Your Website
If you recently moved your WordPress site and now you’re seeing HTTP 404 Page Not Found errors then consider your new permalink structure. For example, you may be using the same domain name but now your site is located in a subdirectory thus all your old permalinks are now invalid since your new permalinks now include subdirectory in domain name portion.
Perhaps now you are using a subdomain then all your permalinks will need to be updated to include subdomain portion of the domain name.
Conclusion
You should pay attention to how your WordPress site generates permalinks because they are pretty important, not only for navigation but also SEO. Well structured WordPress permalink provide clues as to what is on your site and indicates whether your content is what search engines or visitors are seeking.
Being that WordPress permalinks are of such importance working with them can be dauting to many admins. Even the smallest mistakes can break your links and frustrate your visitors. In this tutorial we recommended the process to safely change your permalinks manually or with the aid of plugins.
Hope you find this tutorial helpful. Feel free to let us know your thoughts by commenting below.